In this article
- Step 1: Create a Form
- Step 2: Attach a Form to a Task
- Step 3: Assign the Task to Students or Parents
- Step 4: View and Manage Responses
- (Optional) Connect Form Questions to Custom Properties
- Stop Collecting Form Responses
- Editing Forms
- Duplicating Forms
- Deleting a Form
- District Forms
- Frequently Asked Questions
Counselors: Creating and Assigning Forms
- Step 1: Create a Form
- Step 2: Attach a Form to a Task
- Step 3: Assign the Task to Students or Parents
- Step 4: View and Manage Responses
- (Optional) Connect Form Questions to Custom Properties
- Stop Collecting Form Responses
- Editing Forms
- Duplicating Forms
- Deleting a Form
- District Forms
- Frequently Asked Questions
Forms are how you collect information directly from students or parents/guardians.
Forms cannot be assigned on their own. They need to be attached to a Task, and that Task needs to be assigned to students or parents. Once assigned, recipients will see the Task on their Scoir dashboard containing the Form. When they submit the Form, their responses are captured in Scoir.
If your school is part of a district that uses Scoir’s network services, Forms can be created and published across schools by district admins to ensure consistency and reduce duplication. Talk to your admin about whether network-managed Forms are a good fit for your district.
Scoir is always evolving! Some newer features may not appear in this video, but it should still be close enough for you to follow along.
Step 1: Create a Form
Before you can attach a Form to a Task, you need to create it.
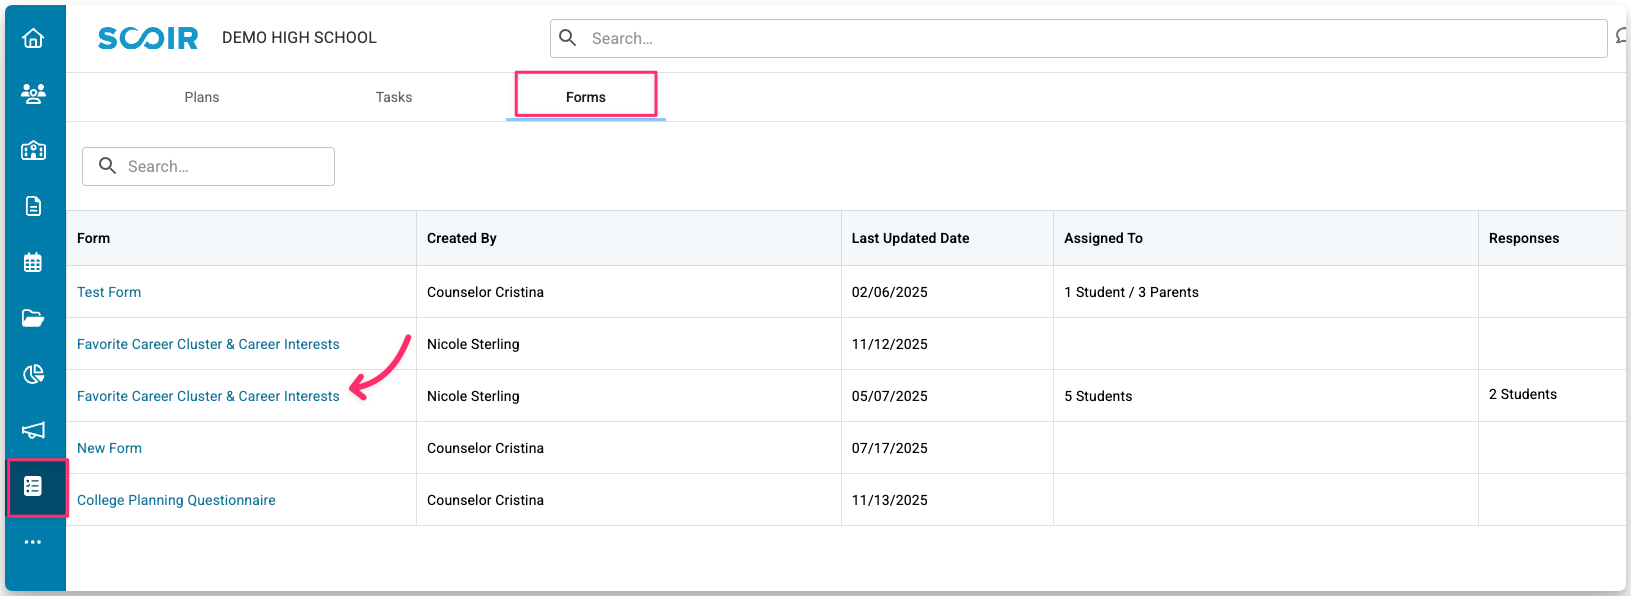
Go to Assignments in the left-hand navigation, then click the Forms tab. This is where all of your school’s Forms will live — created by you, your team, or (if applicable) your district.
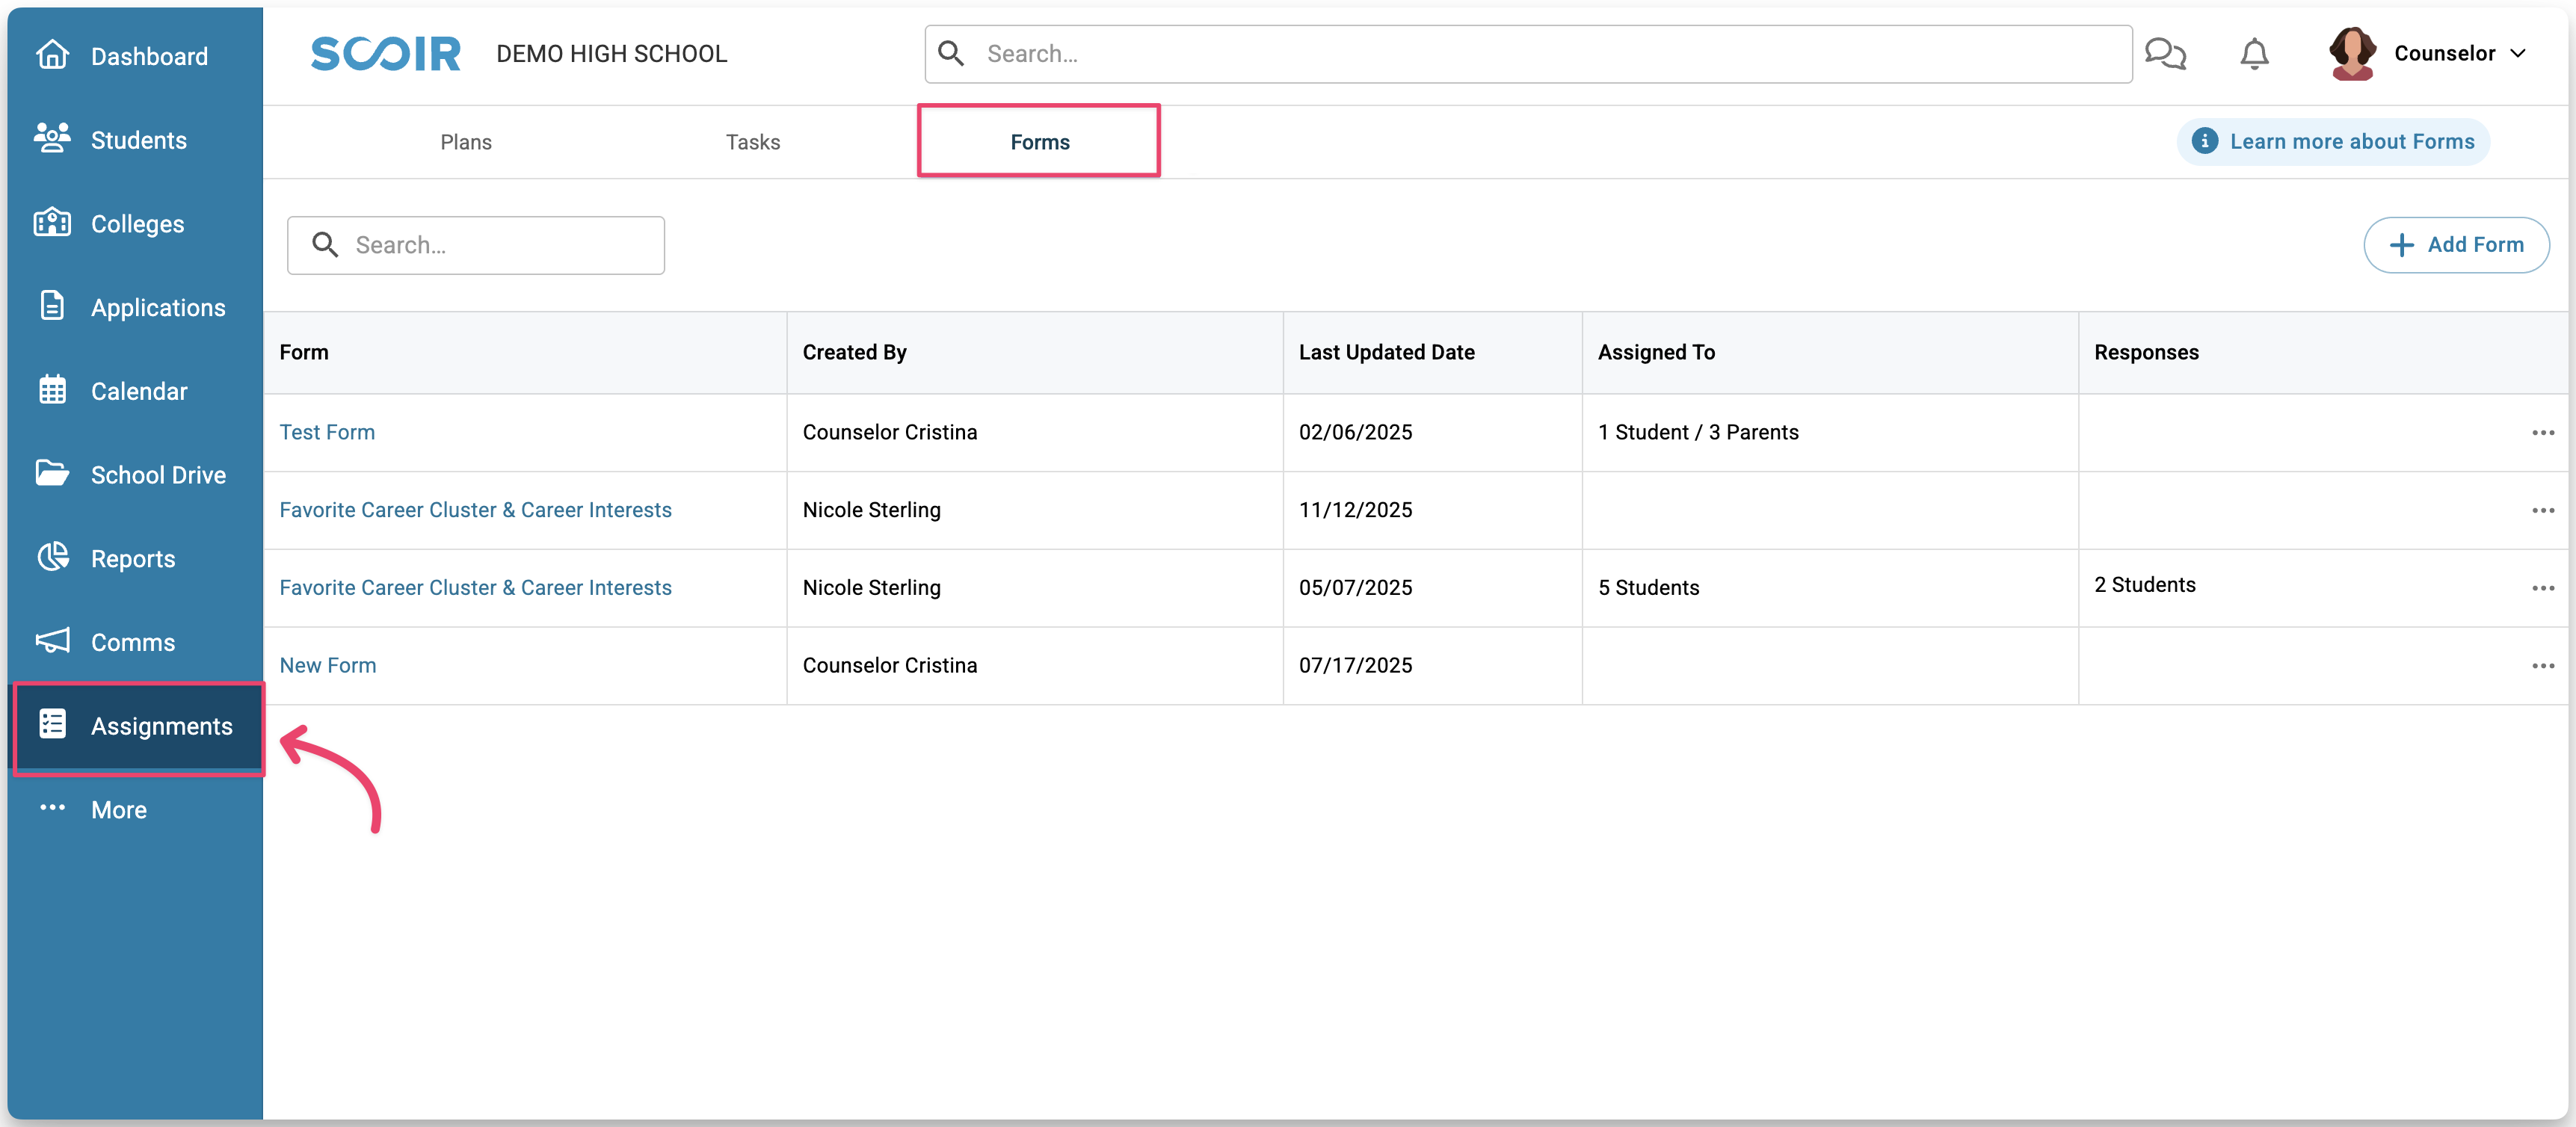
Click +Add Form.
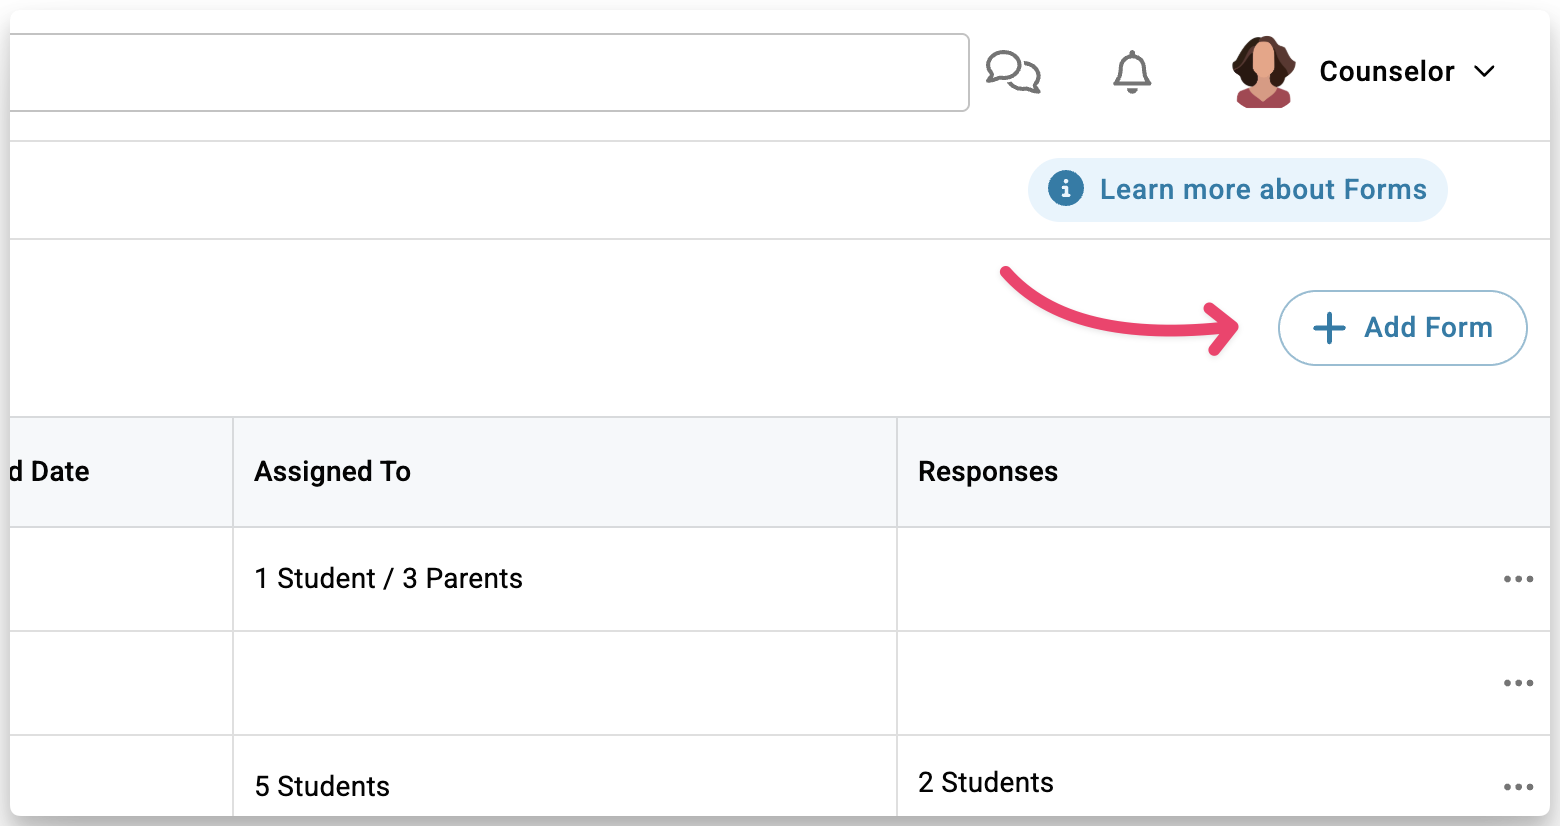
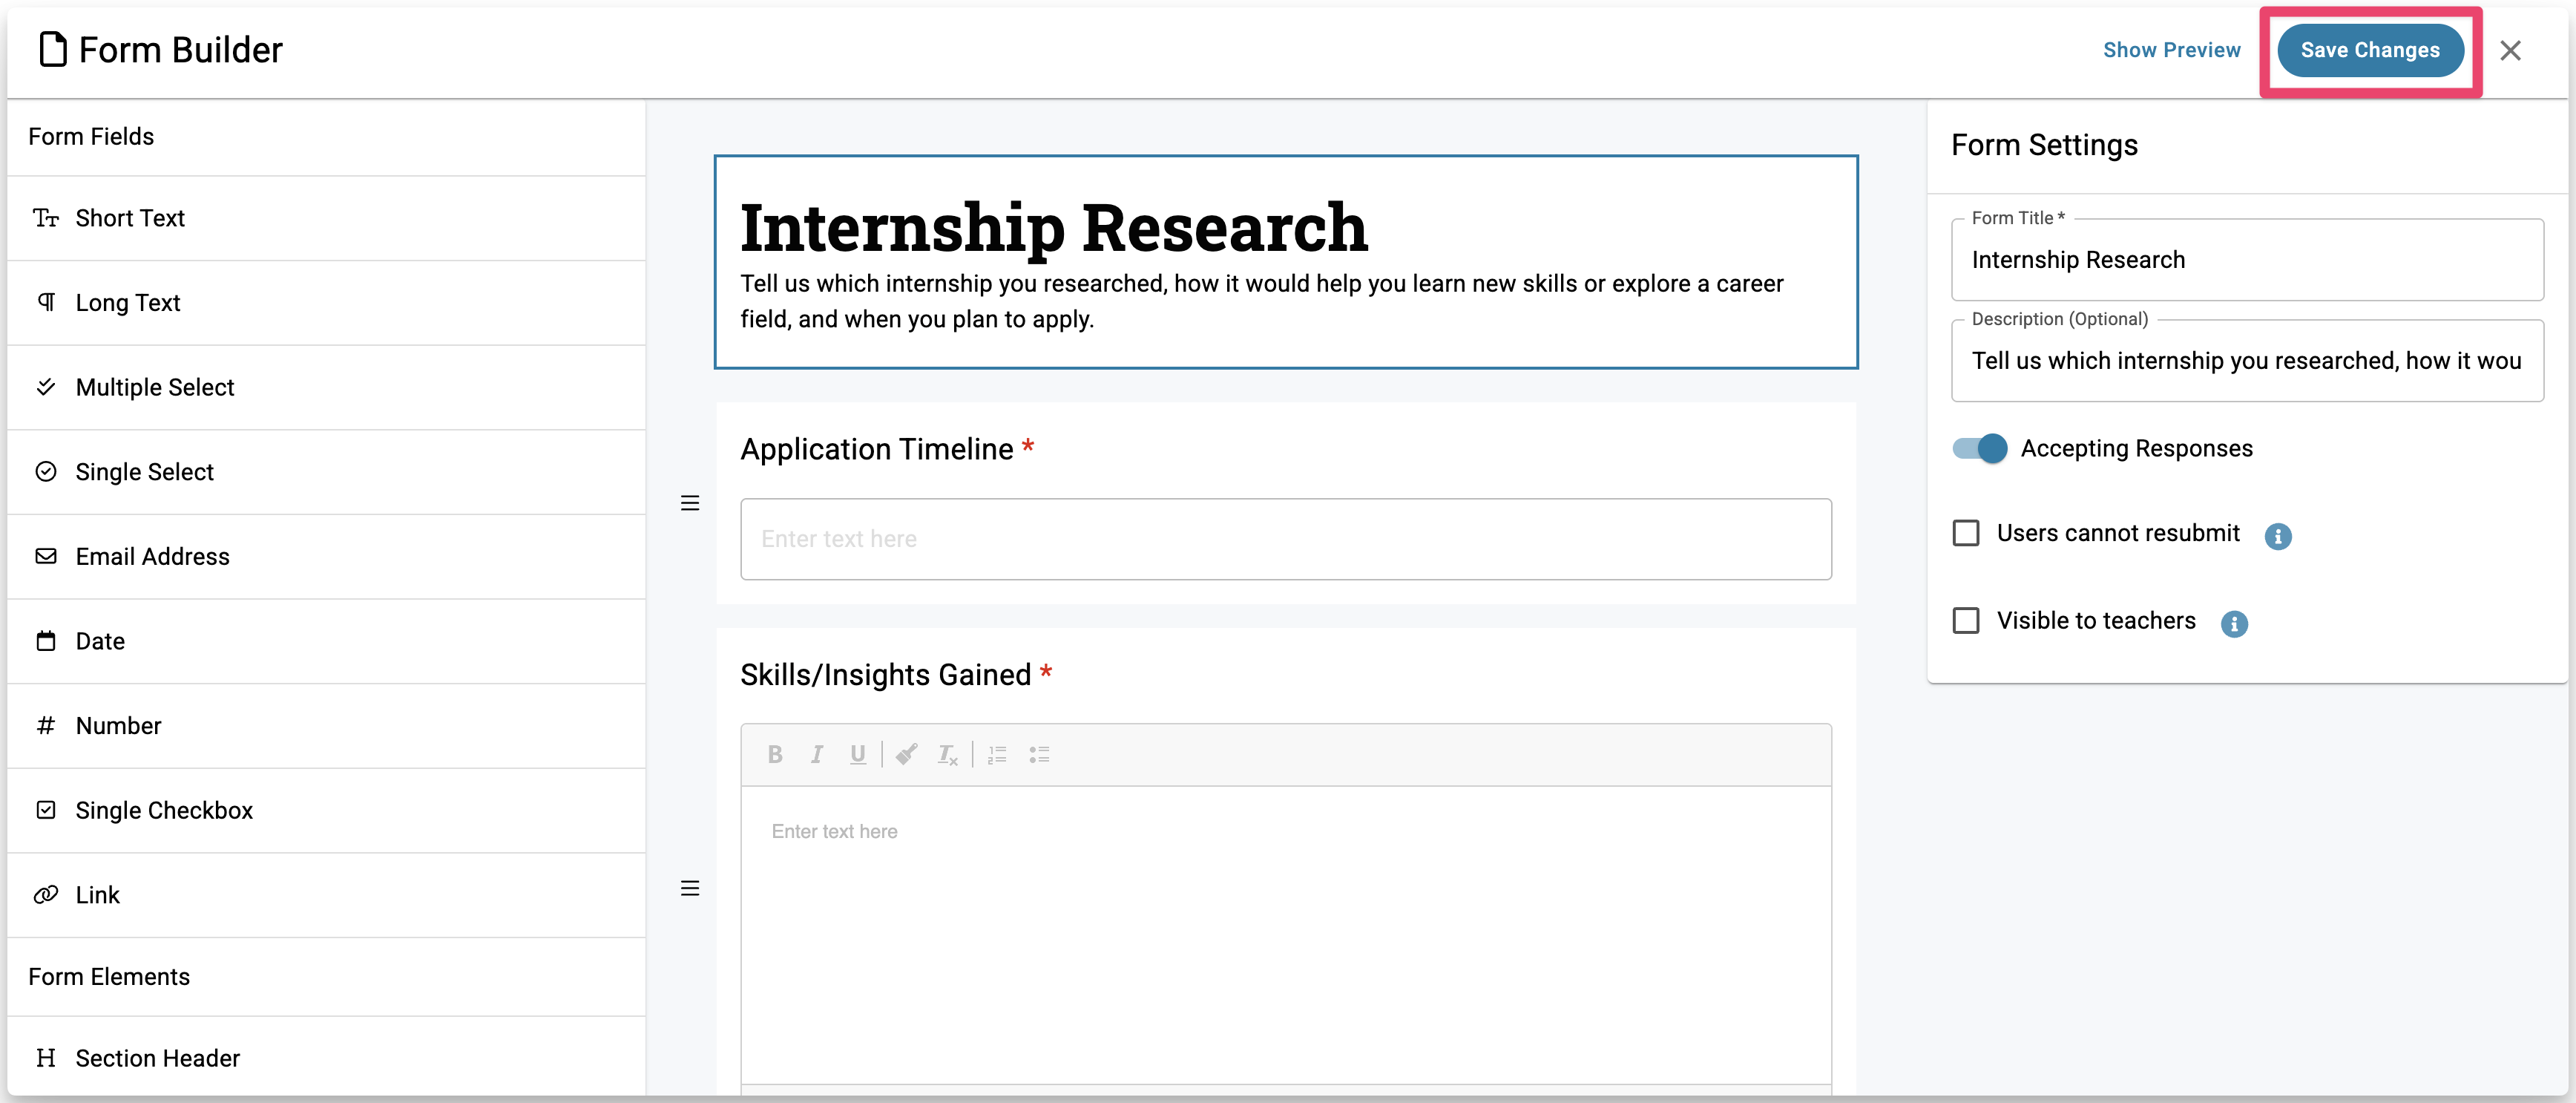
This opens the Form Builder, where you can begin building out your Form.
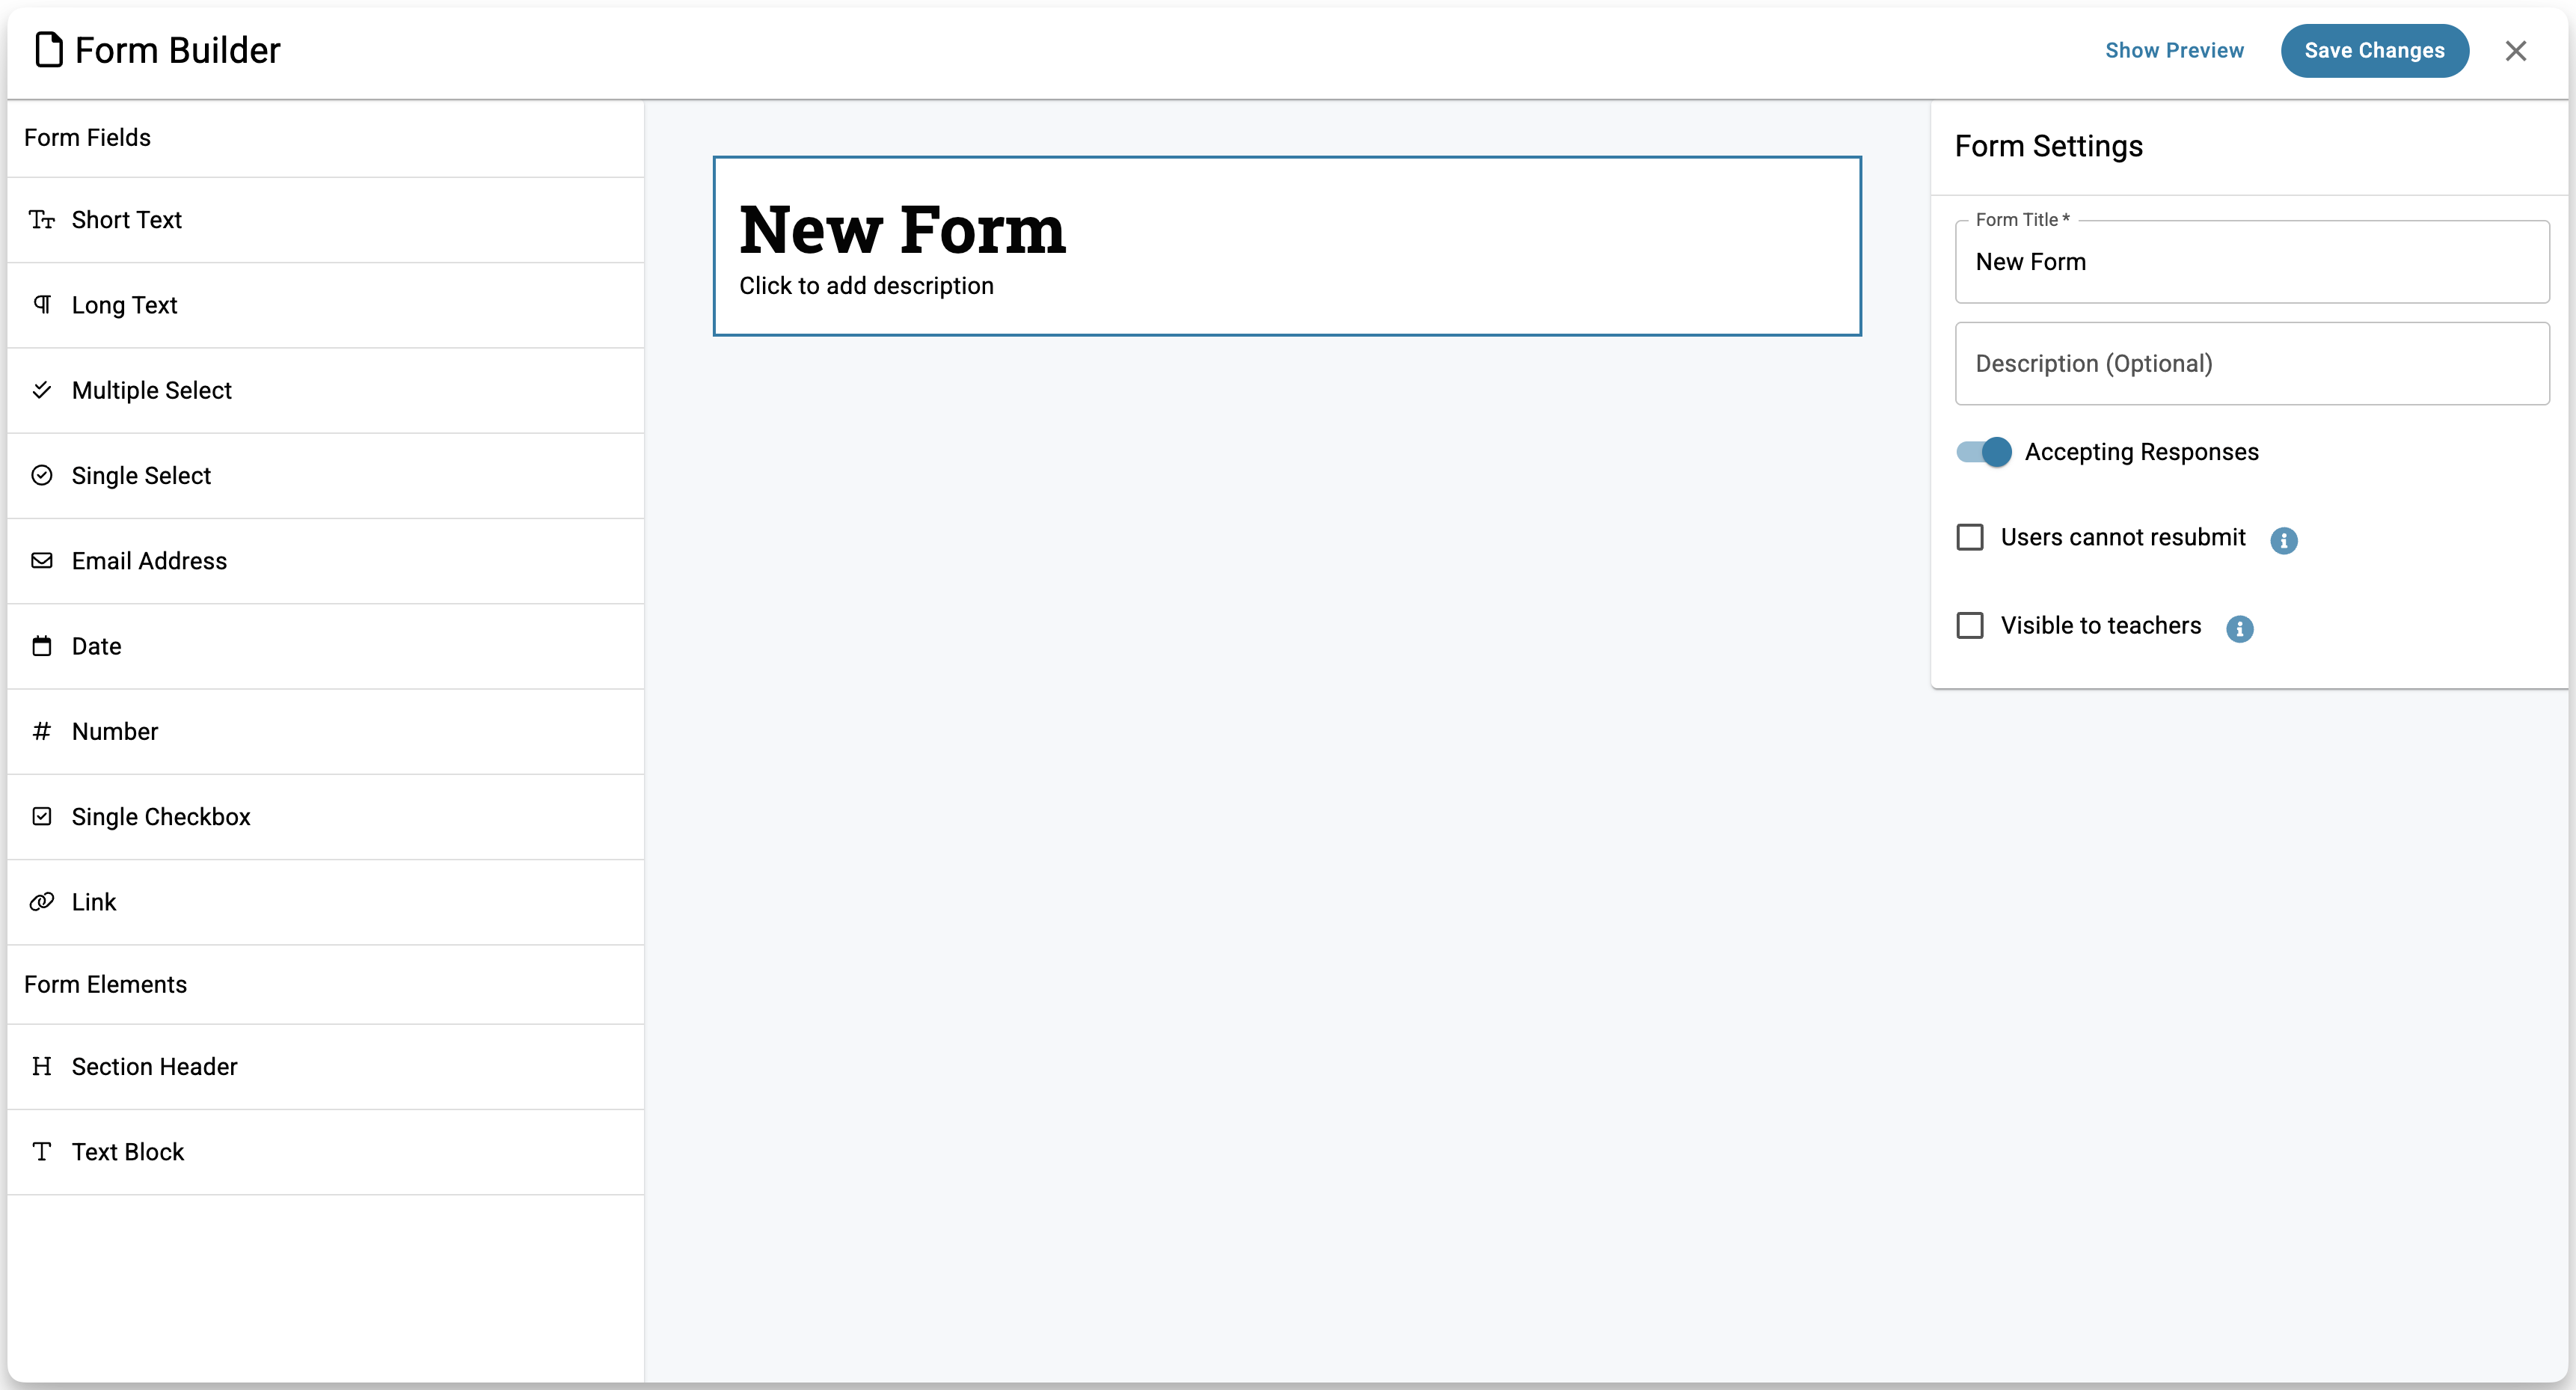
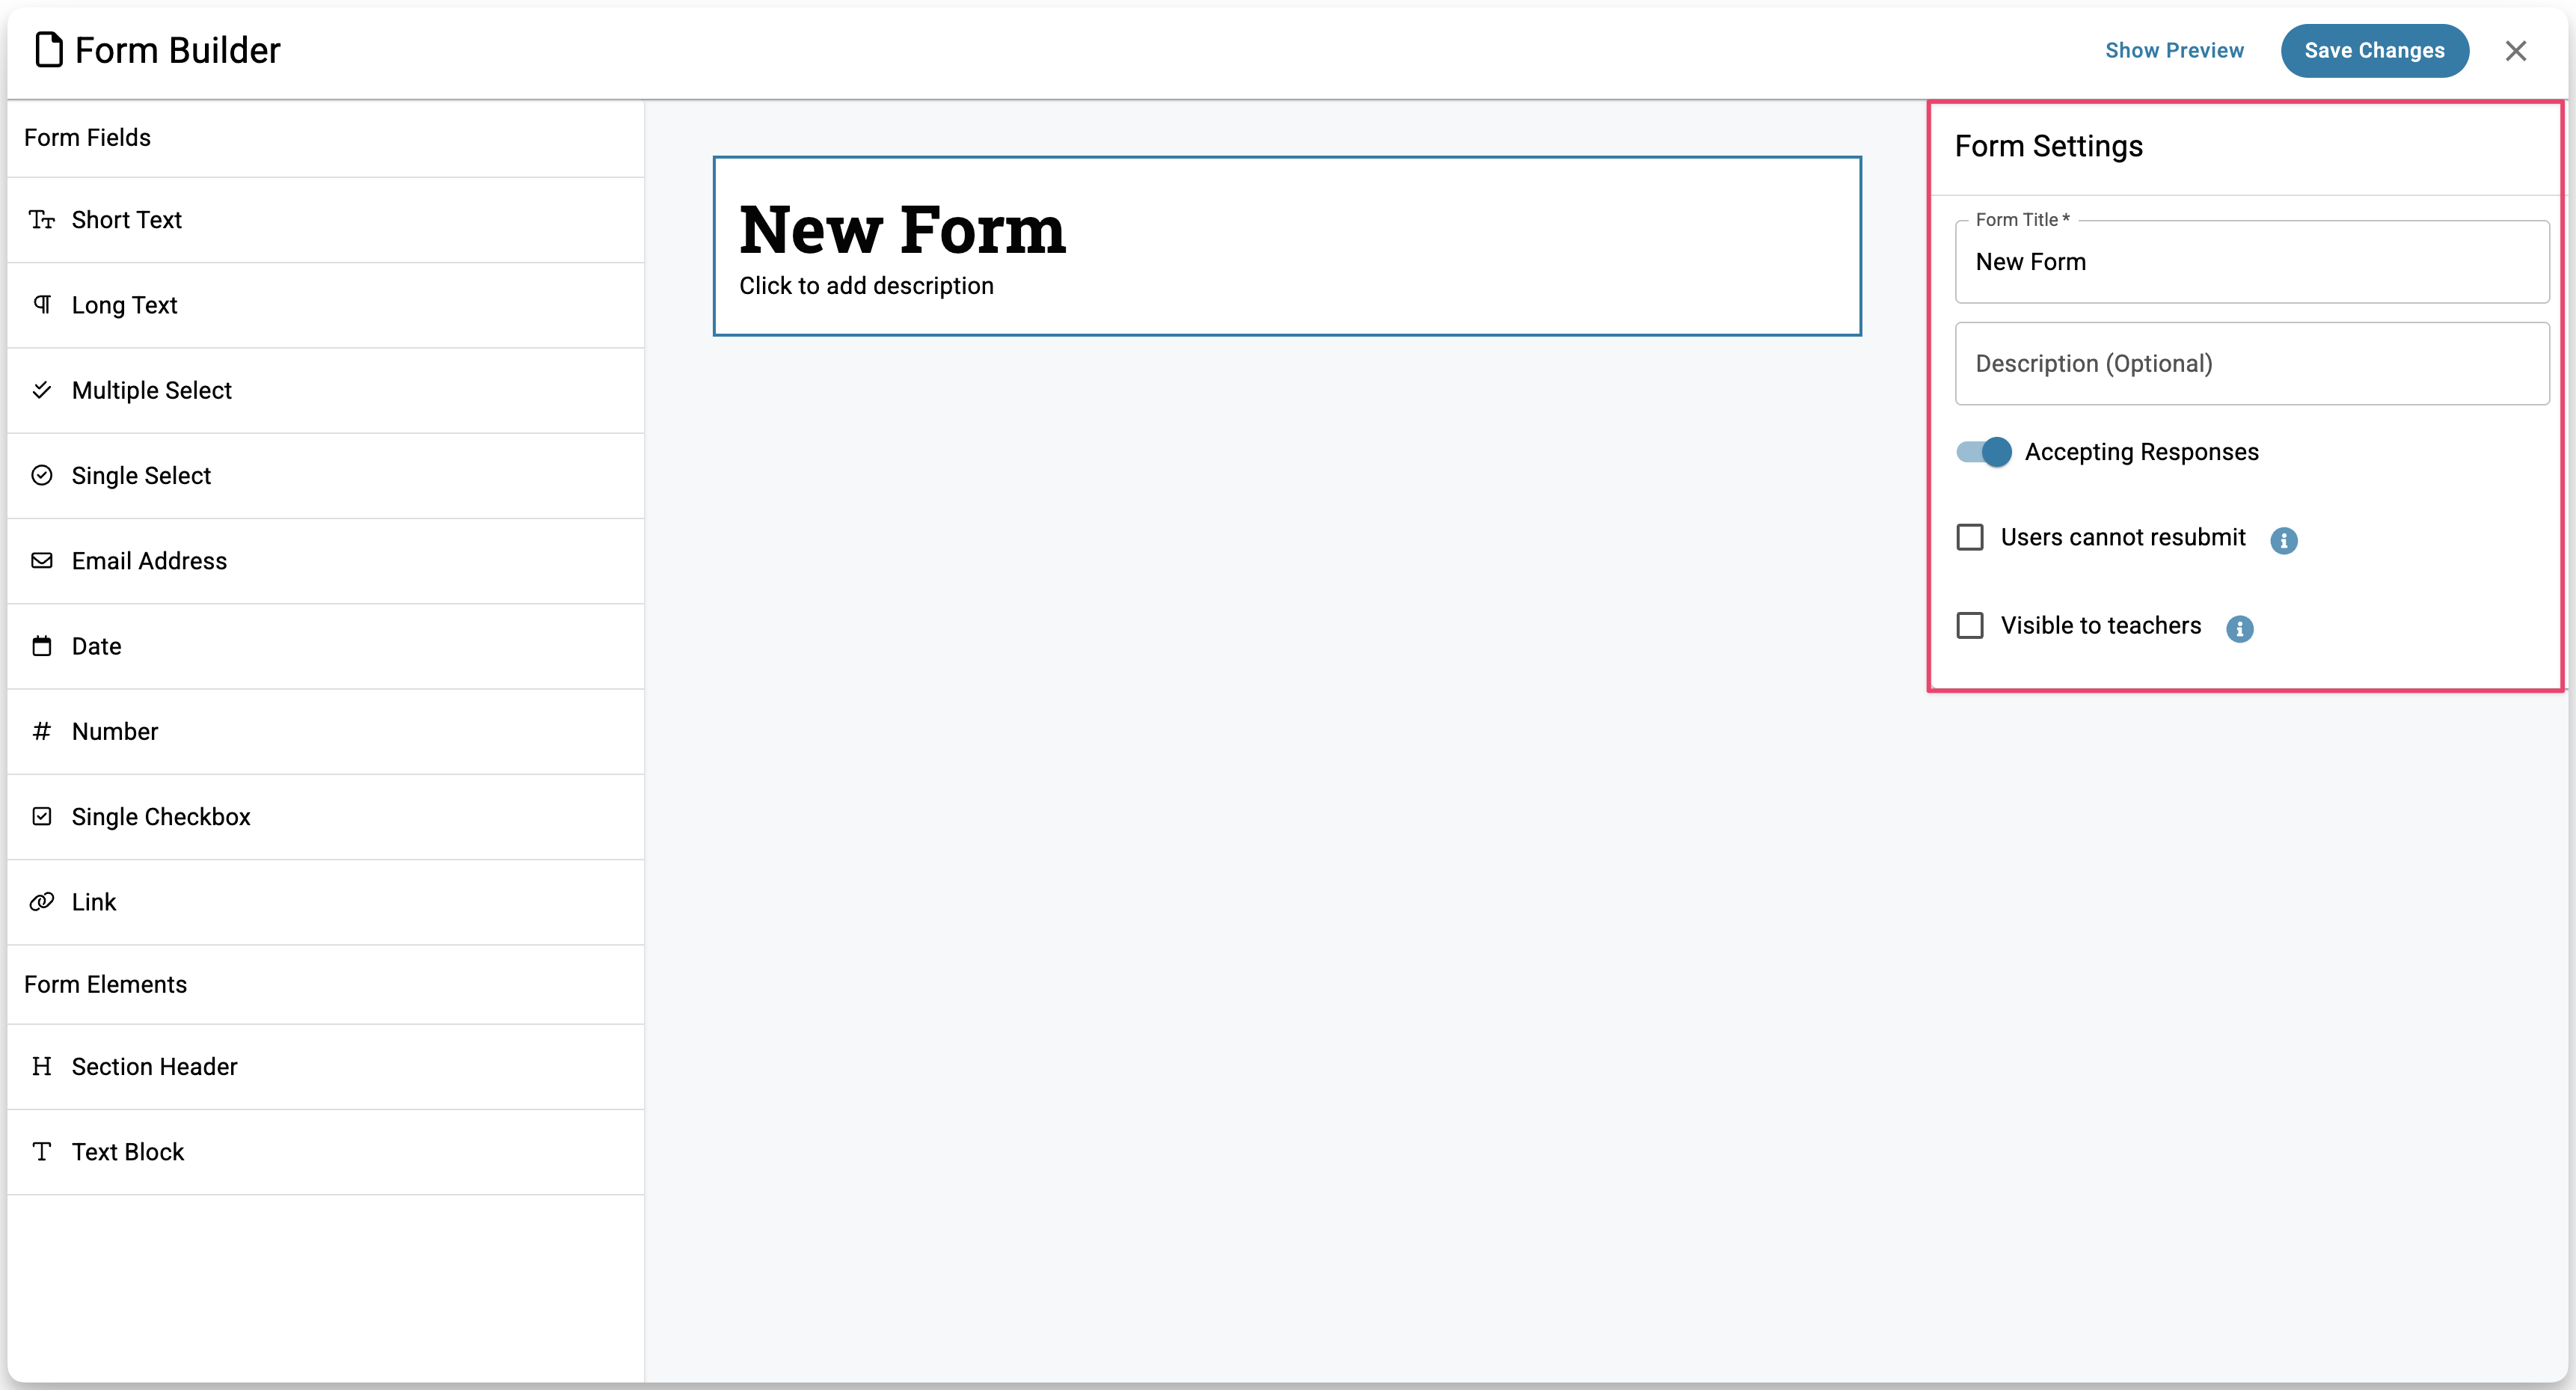
On the right, under Form Settings, fill in the basics:
- Title and description — the description is optional but useful if you want to give students context before they start filling out the Form.
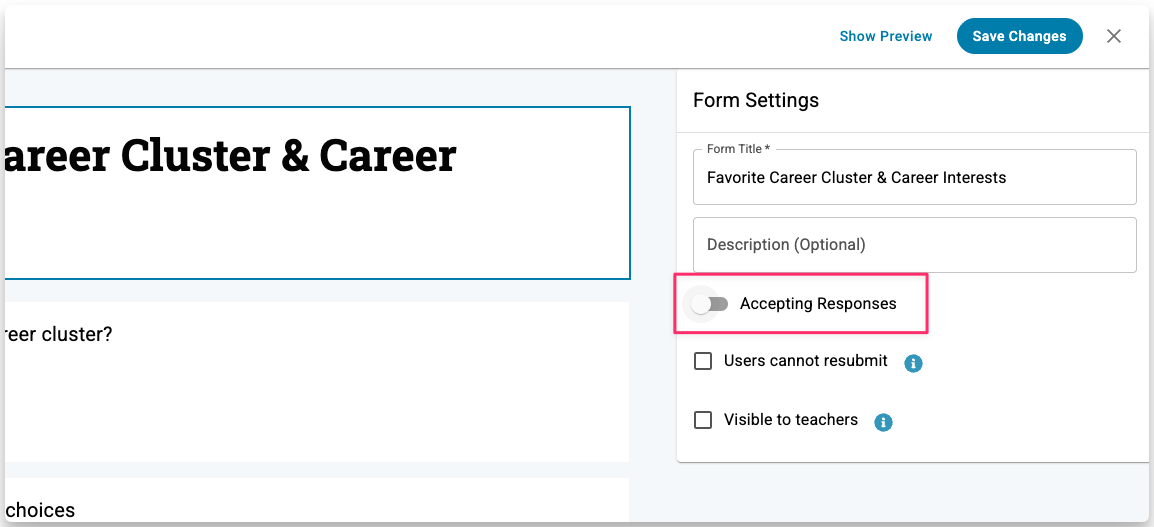
- Accepting Responses — on by default. Turn off if want to stop collecting responses after a deadline.
- Users cannot resubmit — check this to limit each respondent to one submission. Keep in mind that if a student submits and wants to make a change, they won't be able to go back in.
- Visible to teachers — check this to share all responses with teachers that students or counselors have requested recommendations from.
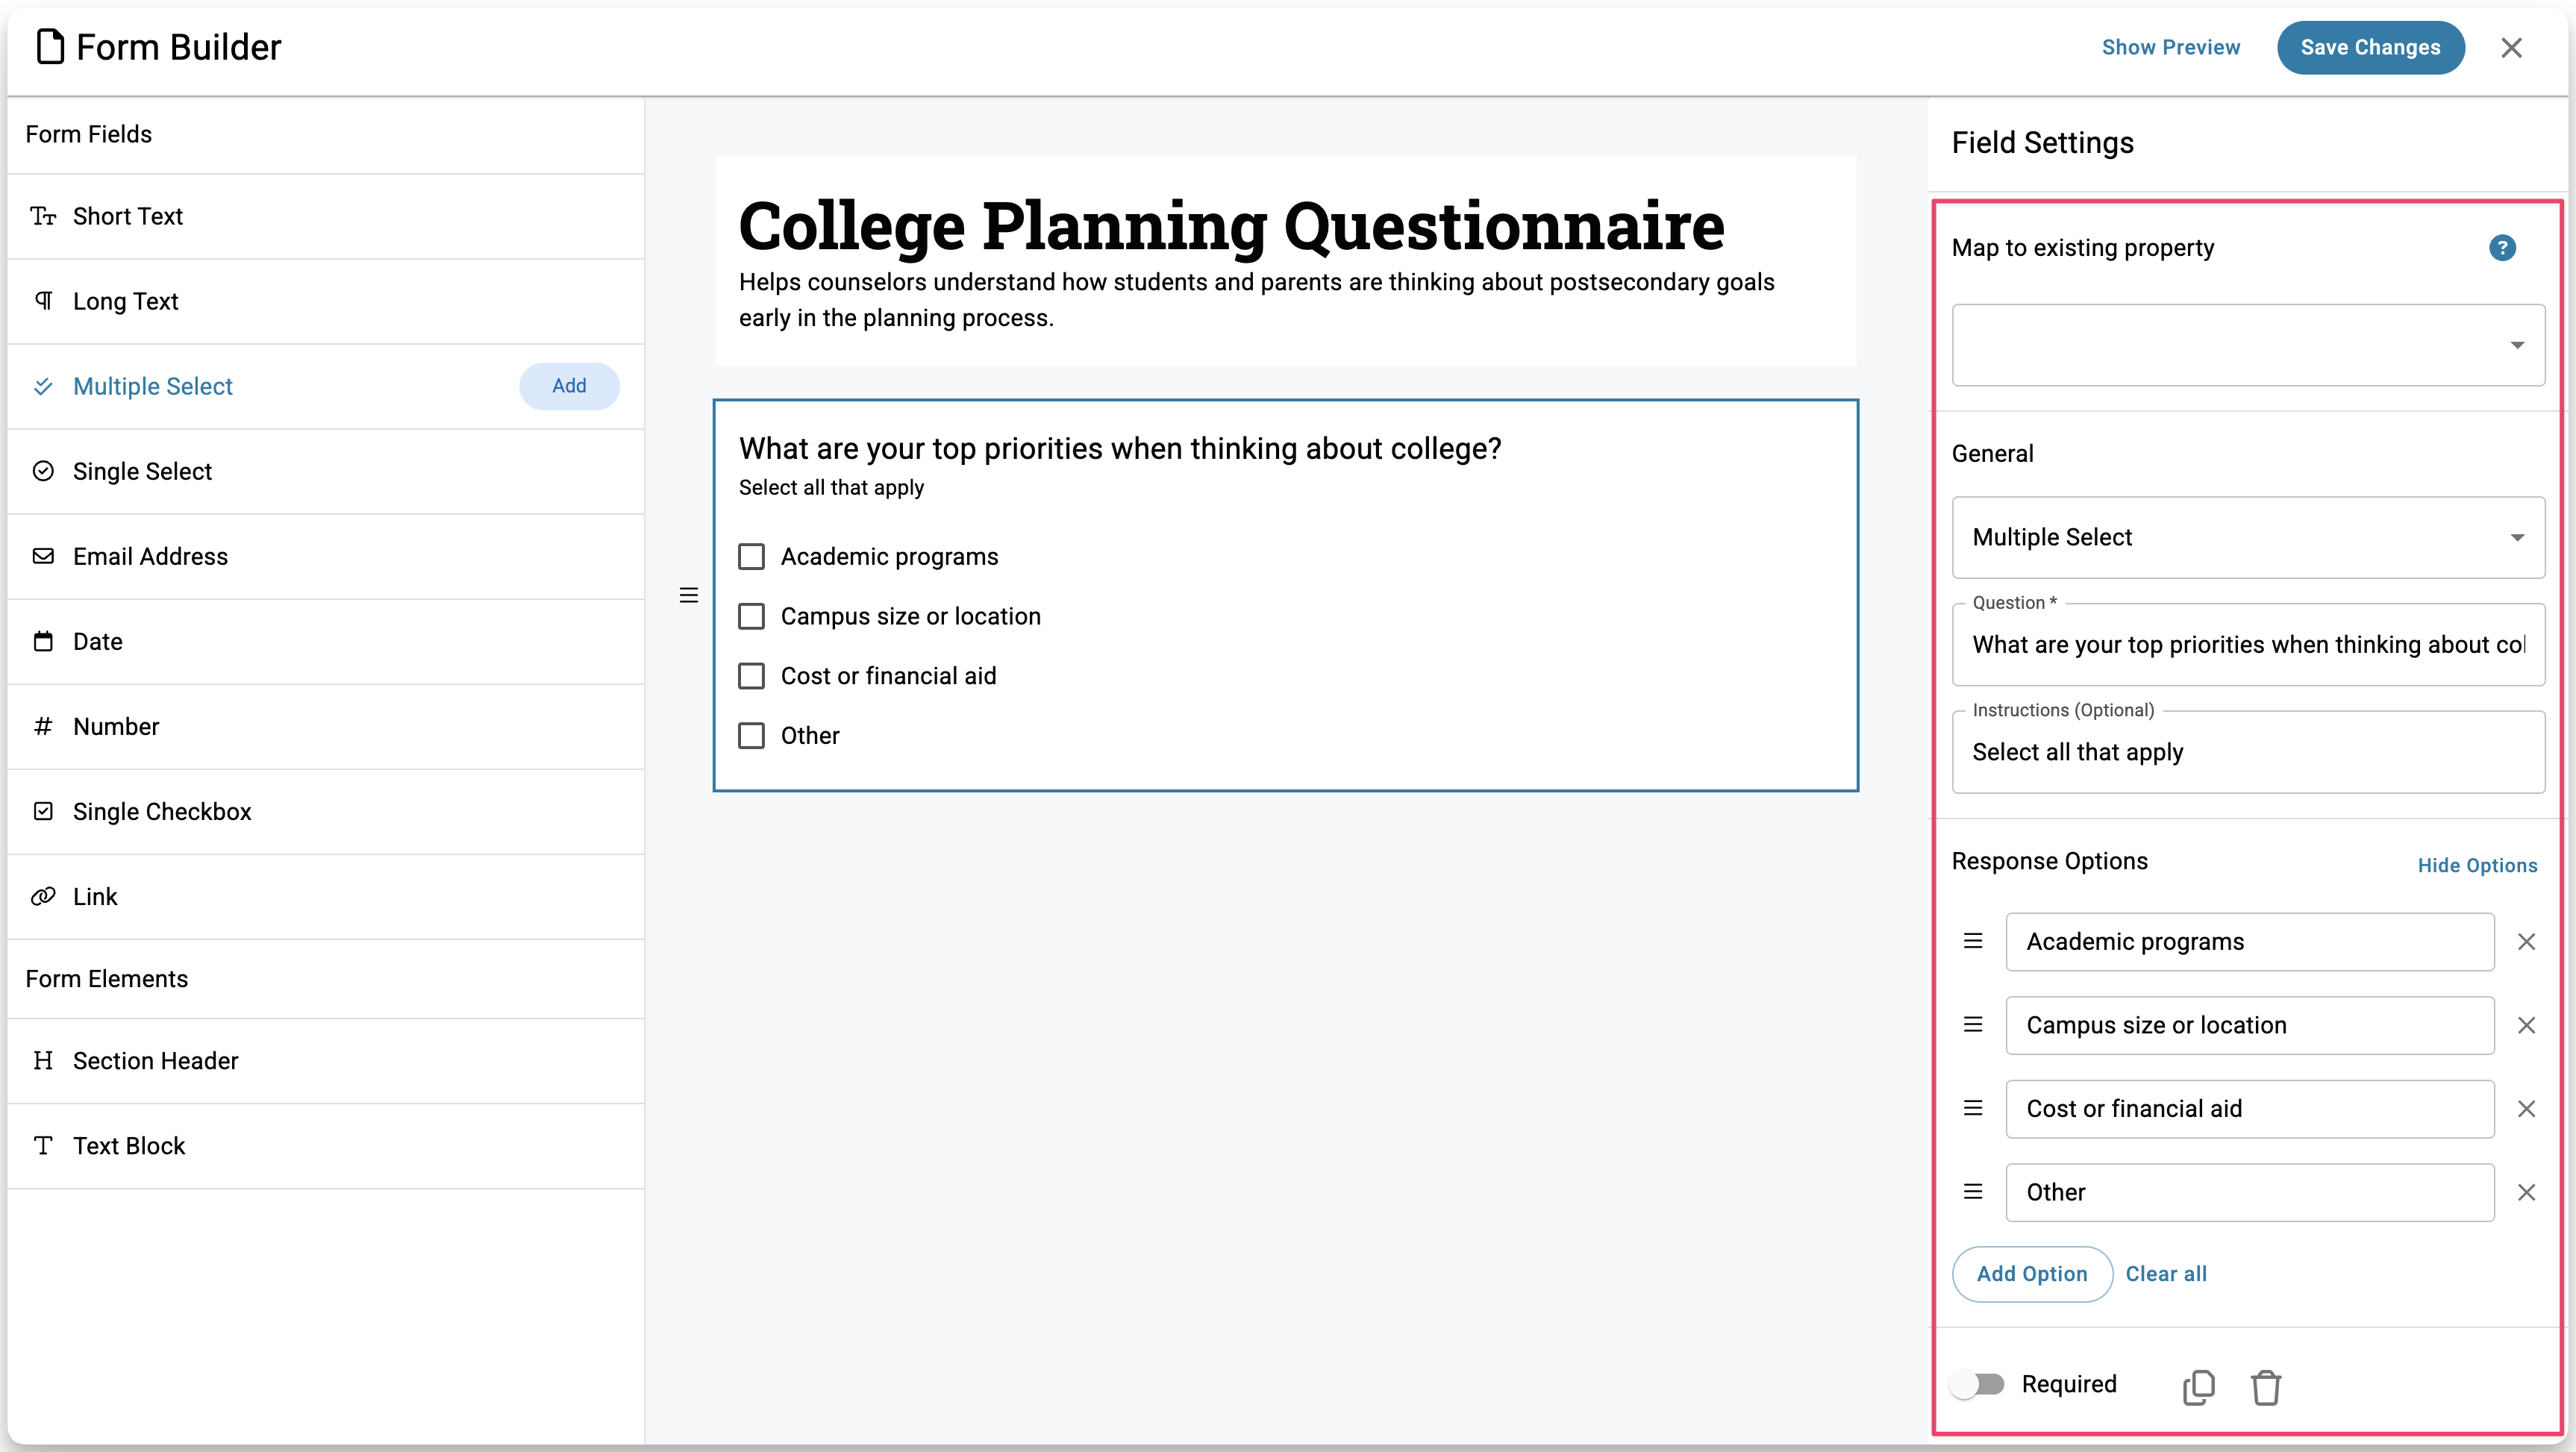
On the left, use the Form Fields panel to add your questions. You can add open-ended fields like Short Text or Long Text, multiple-choice options using Single Select or Multiple Select, and Section Headers or Text Blocks to organize the form and provide context.
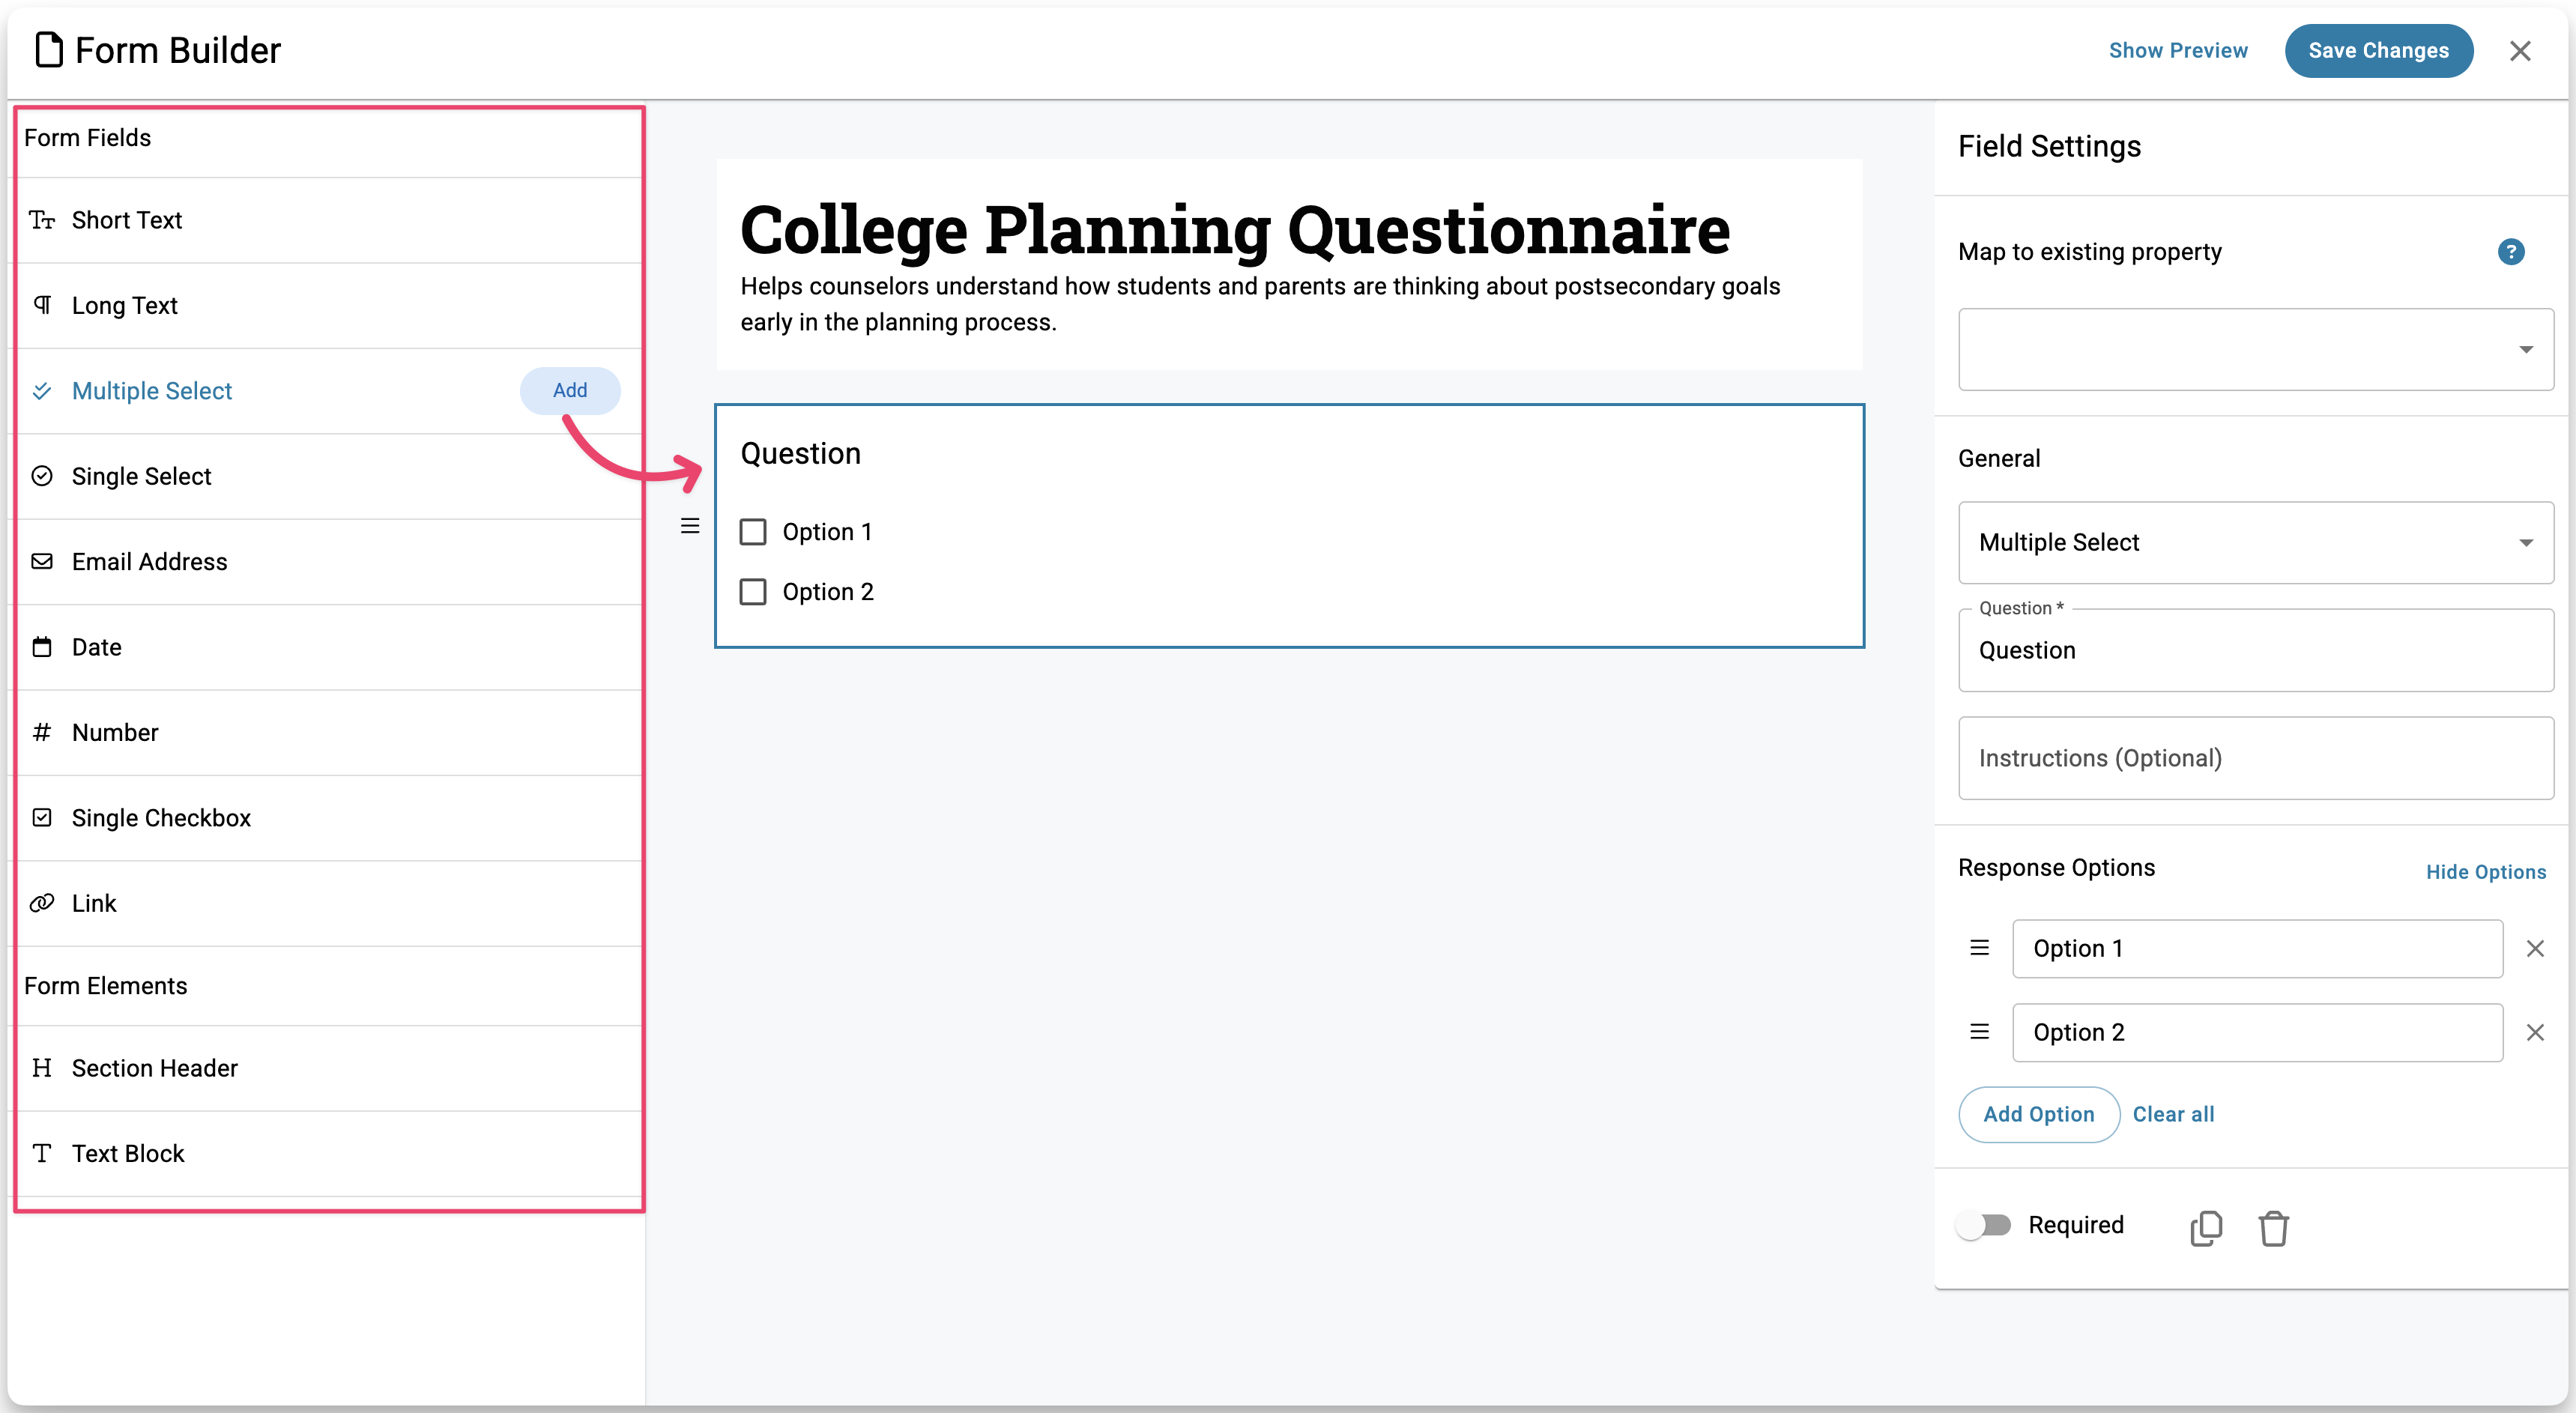
Click any question to open its settings on the right, where you can add a title and instructions, set response options, mark it as Required, or map it to a Custom Property if you want responses to update student data automatically.
Use the trash icon to delete a question or the copy icon to duplicate it.
To reorder questions, drag them by grabbing the three vertical lines on the left side of the question card, or click and drag from the center of the card.
When you're done, click Save Changes. Your form will appear in the Forms table.
Step 2: Attach a Form to a Task
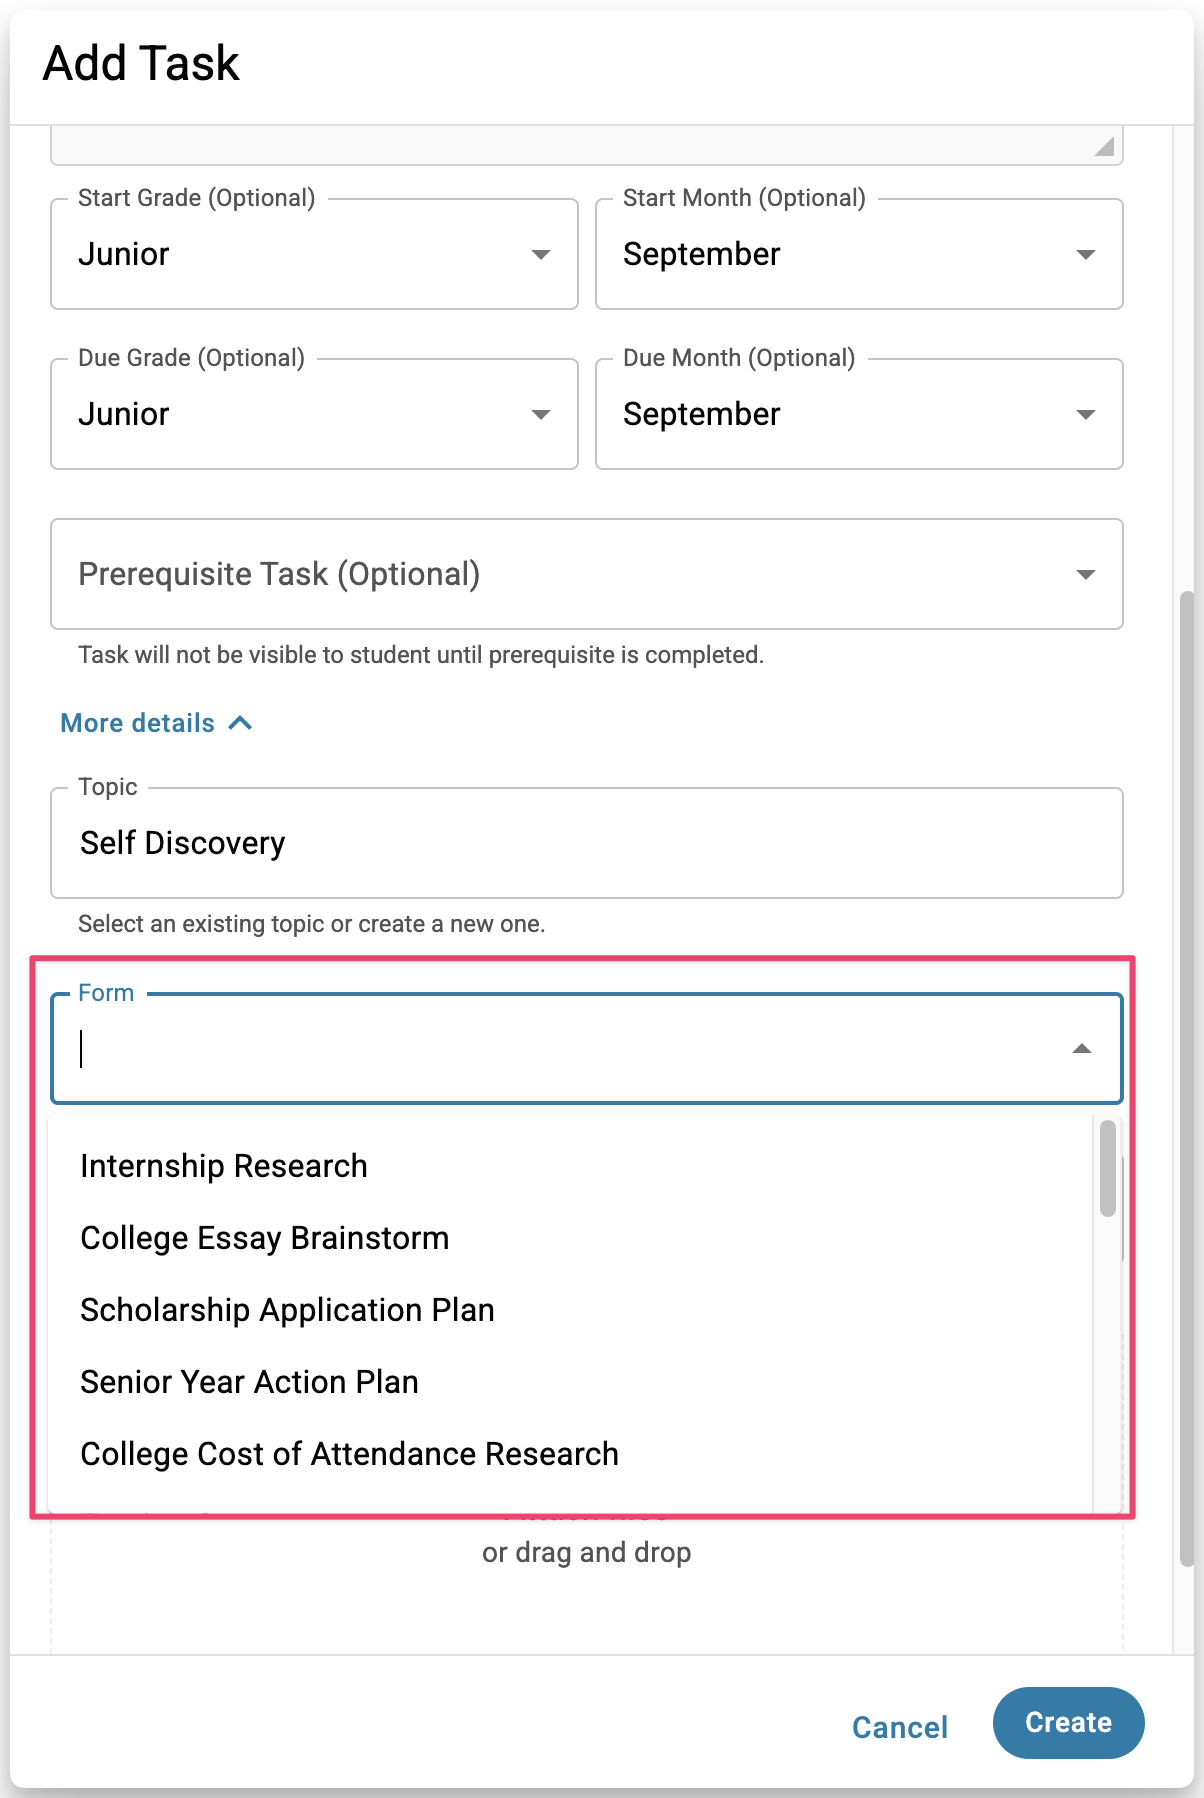
Whether you're creating a new Task or editing an existing one, the process is the same. In the Task window, click More Details at the bottom.

This expands additional fields including the Form dropdown. Click into the dropdown to find and select your Form, then click Create or Save.
Once a Form is attached and the Task is assigned, students or parents will see an option to go to the Form when viewing the Task on their dashboard.
Step 3: Assign the Task to Students or Parents
Once your Task has a Form attached, assign it to the right people. You can assign to students, parents/guardians, or both. To assign to parents, you do so through the student, so start by finding the students whose parents you want to reach.
Tasks are only visible to the audience they are assigned to. Students cannot see Tasks assigned to parents, and parents cannot see Tasks assigned to students.
Assign in Bulk From the Student Roster
Go to your Student Roster and use filters to narrow down your group of students (for example, by class year). Select one or more students, then click Manage Assignments > Assign Existing Task in the toolbar that appears.
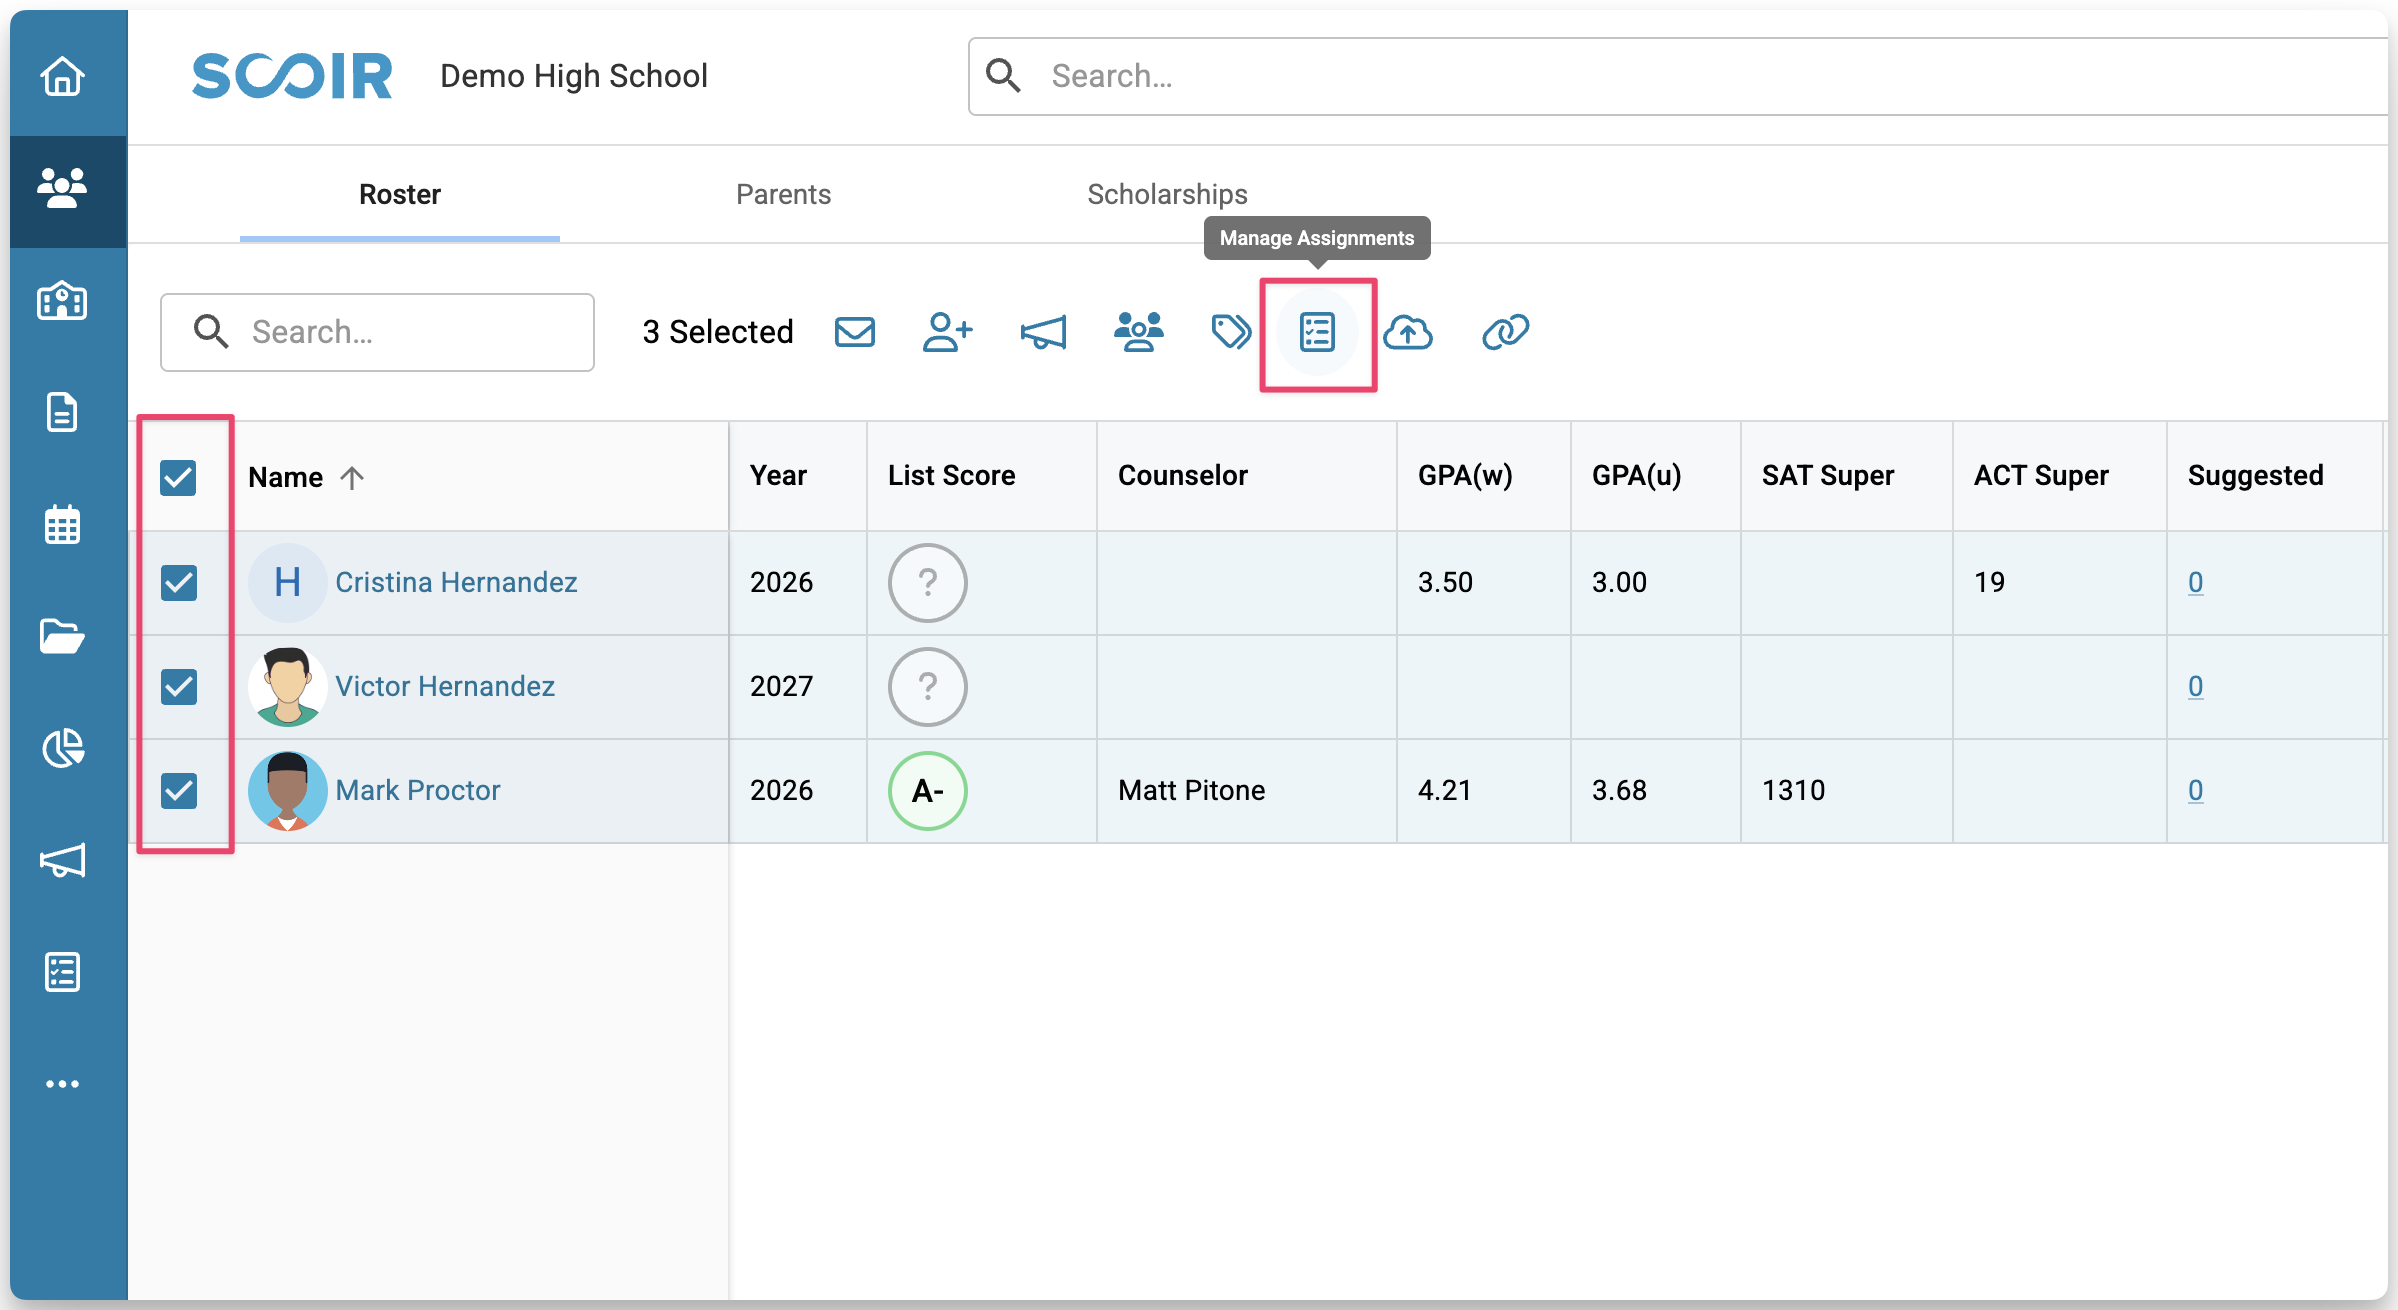
Search for and select your Task.

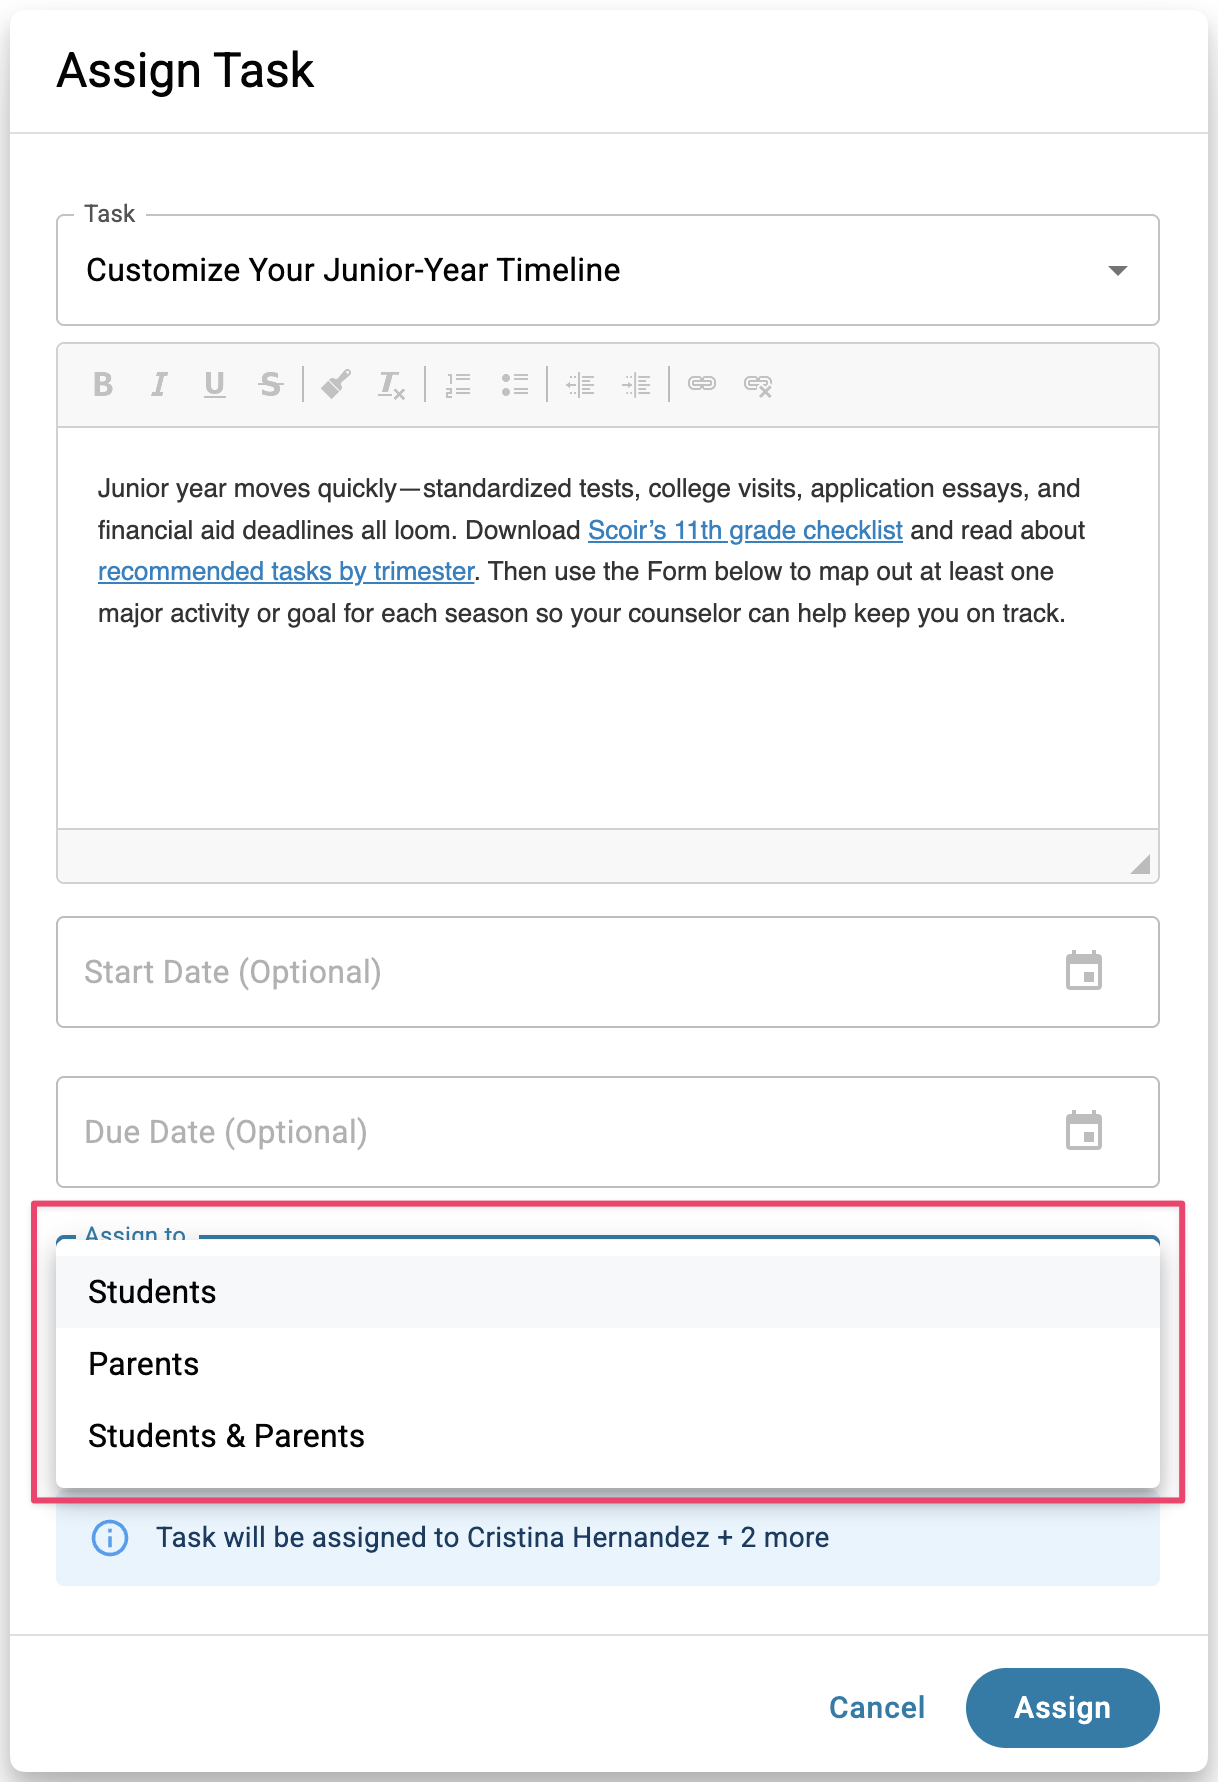
In the window, use the Assign to dropdown to select students, parents, or both. We also recommend expanding More Details to confirm the correct Form is attached. Click Assign when ready.
For full details and more options on assigning Tasks, see For Counselors: Creating and Assigning Tasks
Assign as Part of a Plan
If your Task is part of a Plan, it gets assigned to students when you publish the Plan rather than through the Student Roster. Publishing assigns the Tasks in the Plan to the appropriate group of students all at once.
For more on how Plans work, see For Counselors: Creating and Managing Assignment Plans.
Step 4: View and Manage Responses
Once your Form has been shared and respondents begin submitting answers, you can view and manage responses right from the Forms tab.
View All Responses
- Go to Assignments > Forms and select the Form name.
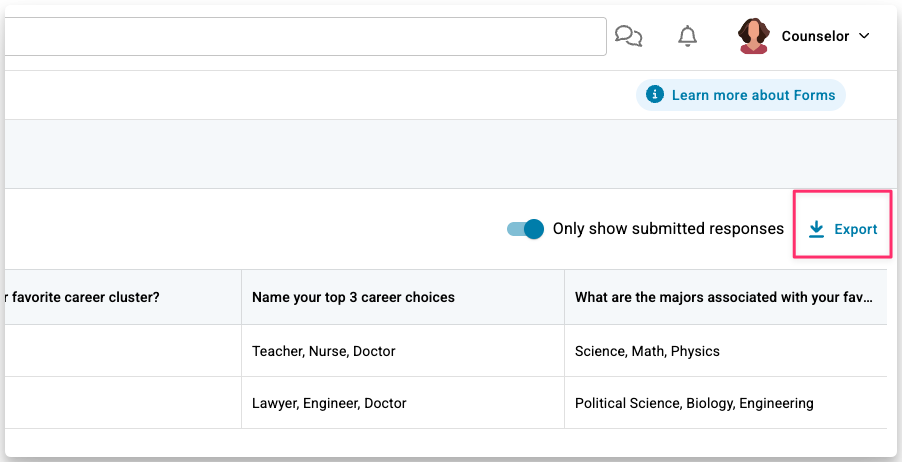
- You’ll see a table with each respondent’s details, plus columns for every question in your Form. For long text answers, click View Response in that column to see the full answer. You can also turn on Only show submitted responses in the top right to focus on completed entries.
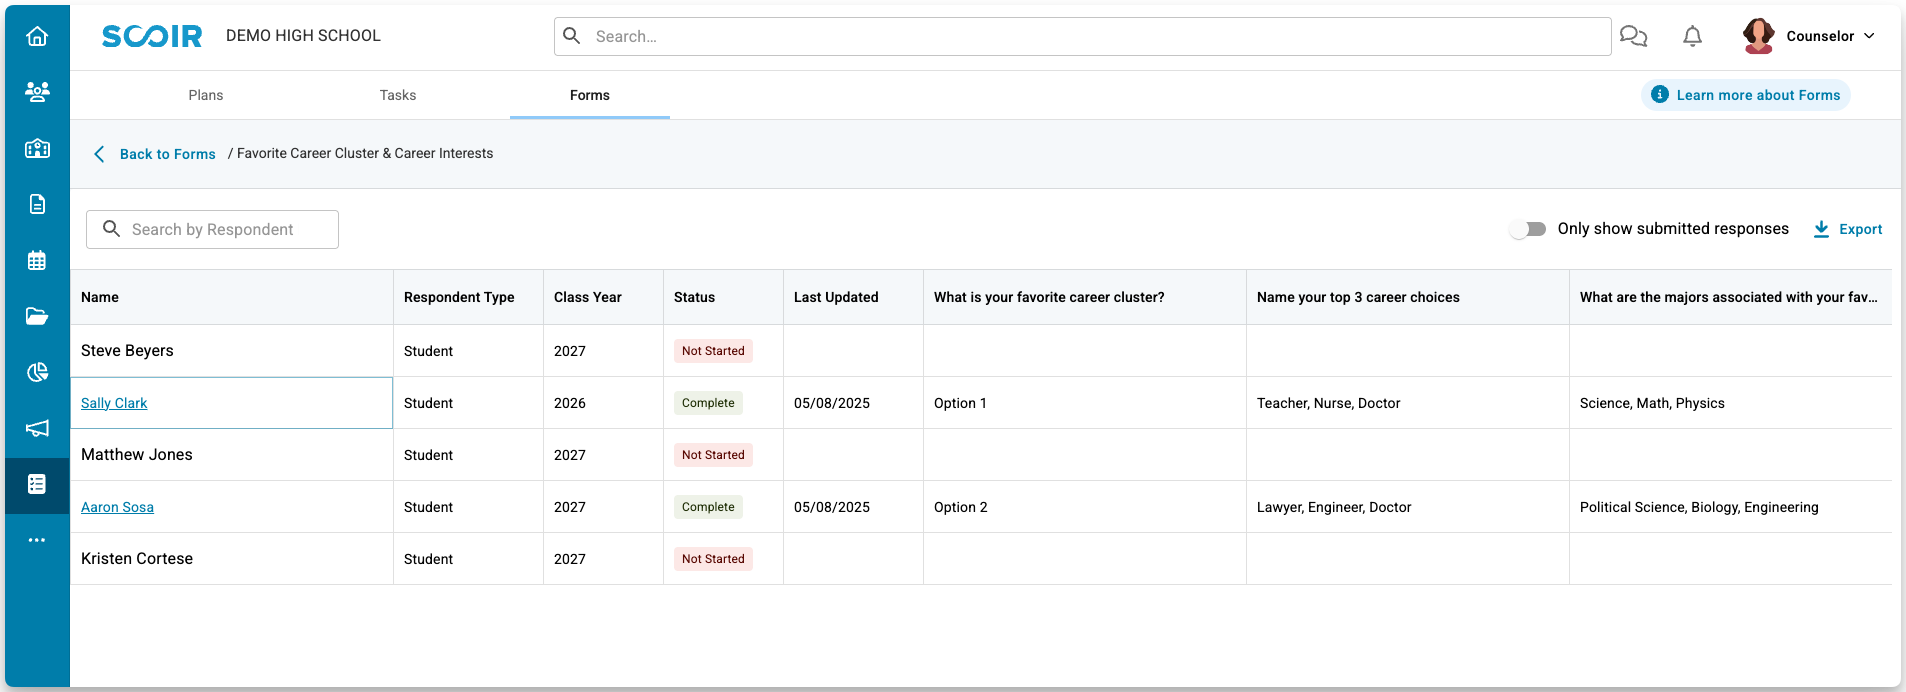
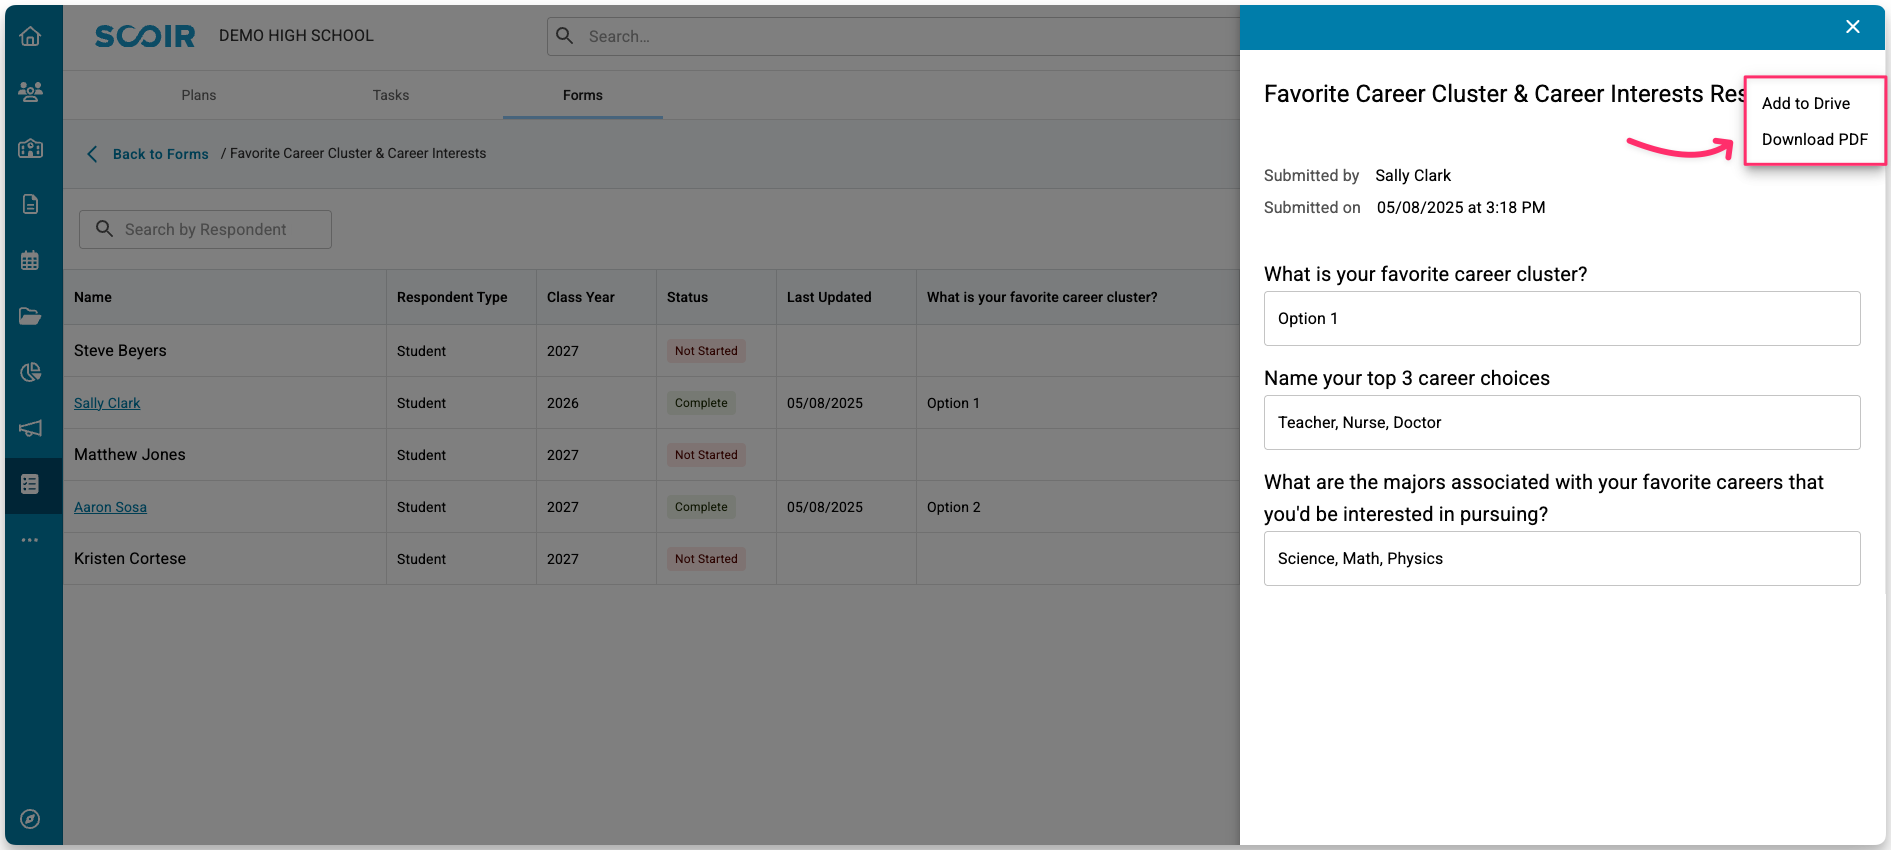
- To view everything a respondent submitted, search for and click their name in the table to open a panel with all of their responses. From there, you can download a PDF of that user’s responses or add their responses to MyDrive.
- (Optional) To download all responses, click Export to save a CSV file. If you only want completed submissions, turn on Only show submitted responses before exporting.
View a Student’s Responses from Their Profile
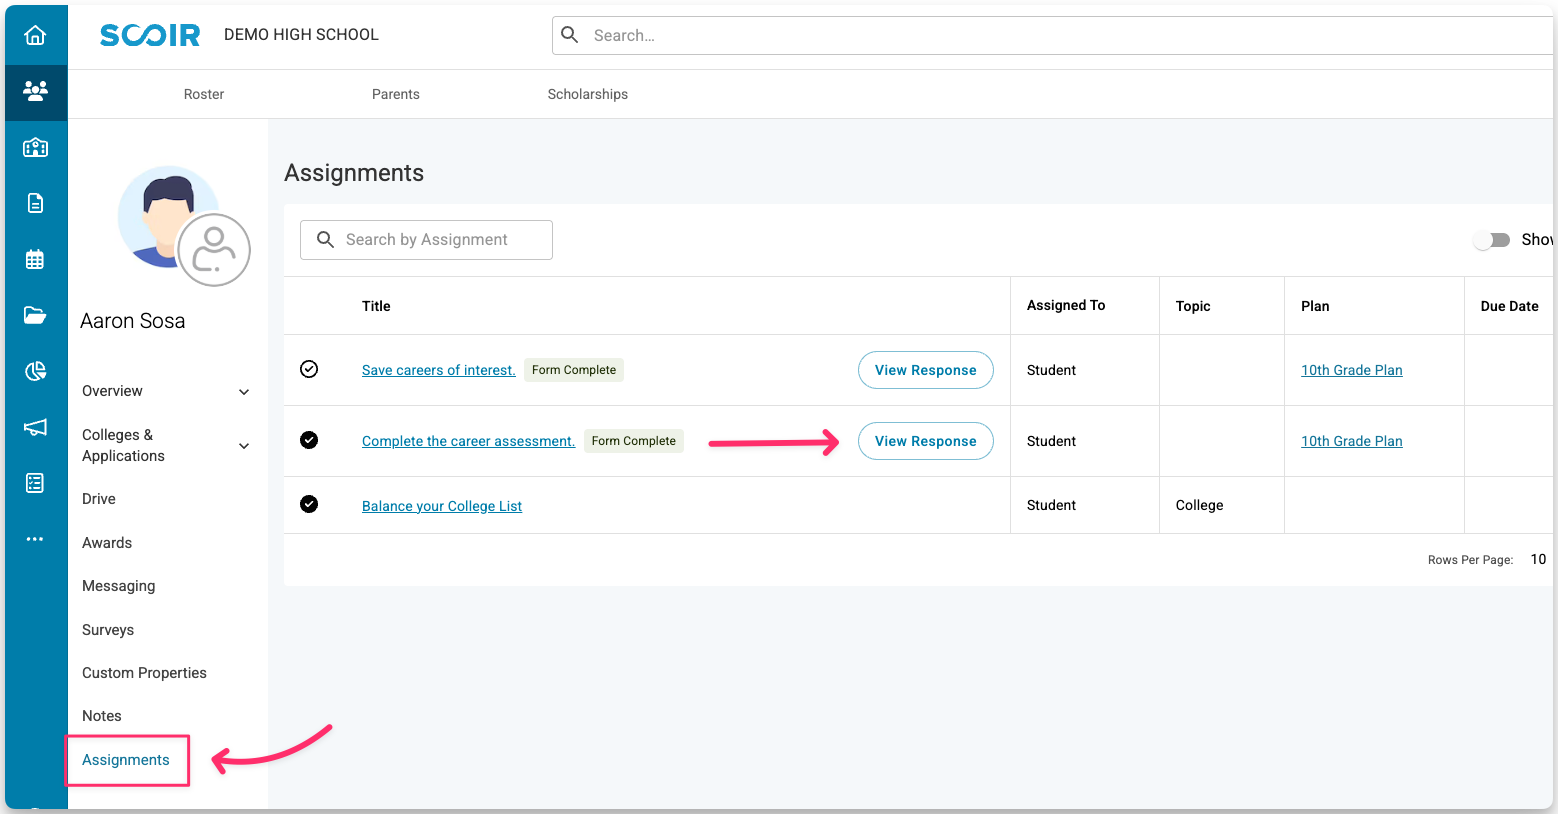
You can also view a student’s Form responses directly from their profile.
Go to the student’s profile, select Assignments, find the Task that includes the Form, and click View Response to see everything they submitted. (This option is only available for student responses.)
(Optional) Connect Form Questions to Custom Properties
If there's data you want to track that we don't have a field for, you can map Form questions to Custom Properties, which populate directly on the student profile and in your Student Roster for easy filtering and reporting.
Custom Properties are custom fields you create to track information that Scoir doesn't already collect. Mapping a Form question to a Custom Property means that when a student submits the Form, their answer is automatically saved to that field in their profile. For example, if you have a Custom Property called "Career Interests" and connect it to a Form question, the student's response saves directly to that field.
If the student already has a value saved in that field, they'll see it pre-filled when they open the Form. Whatever they submit will update their profile with the most recent answer.
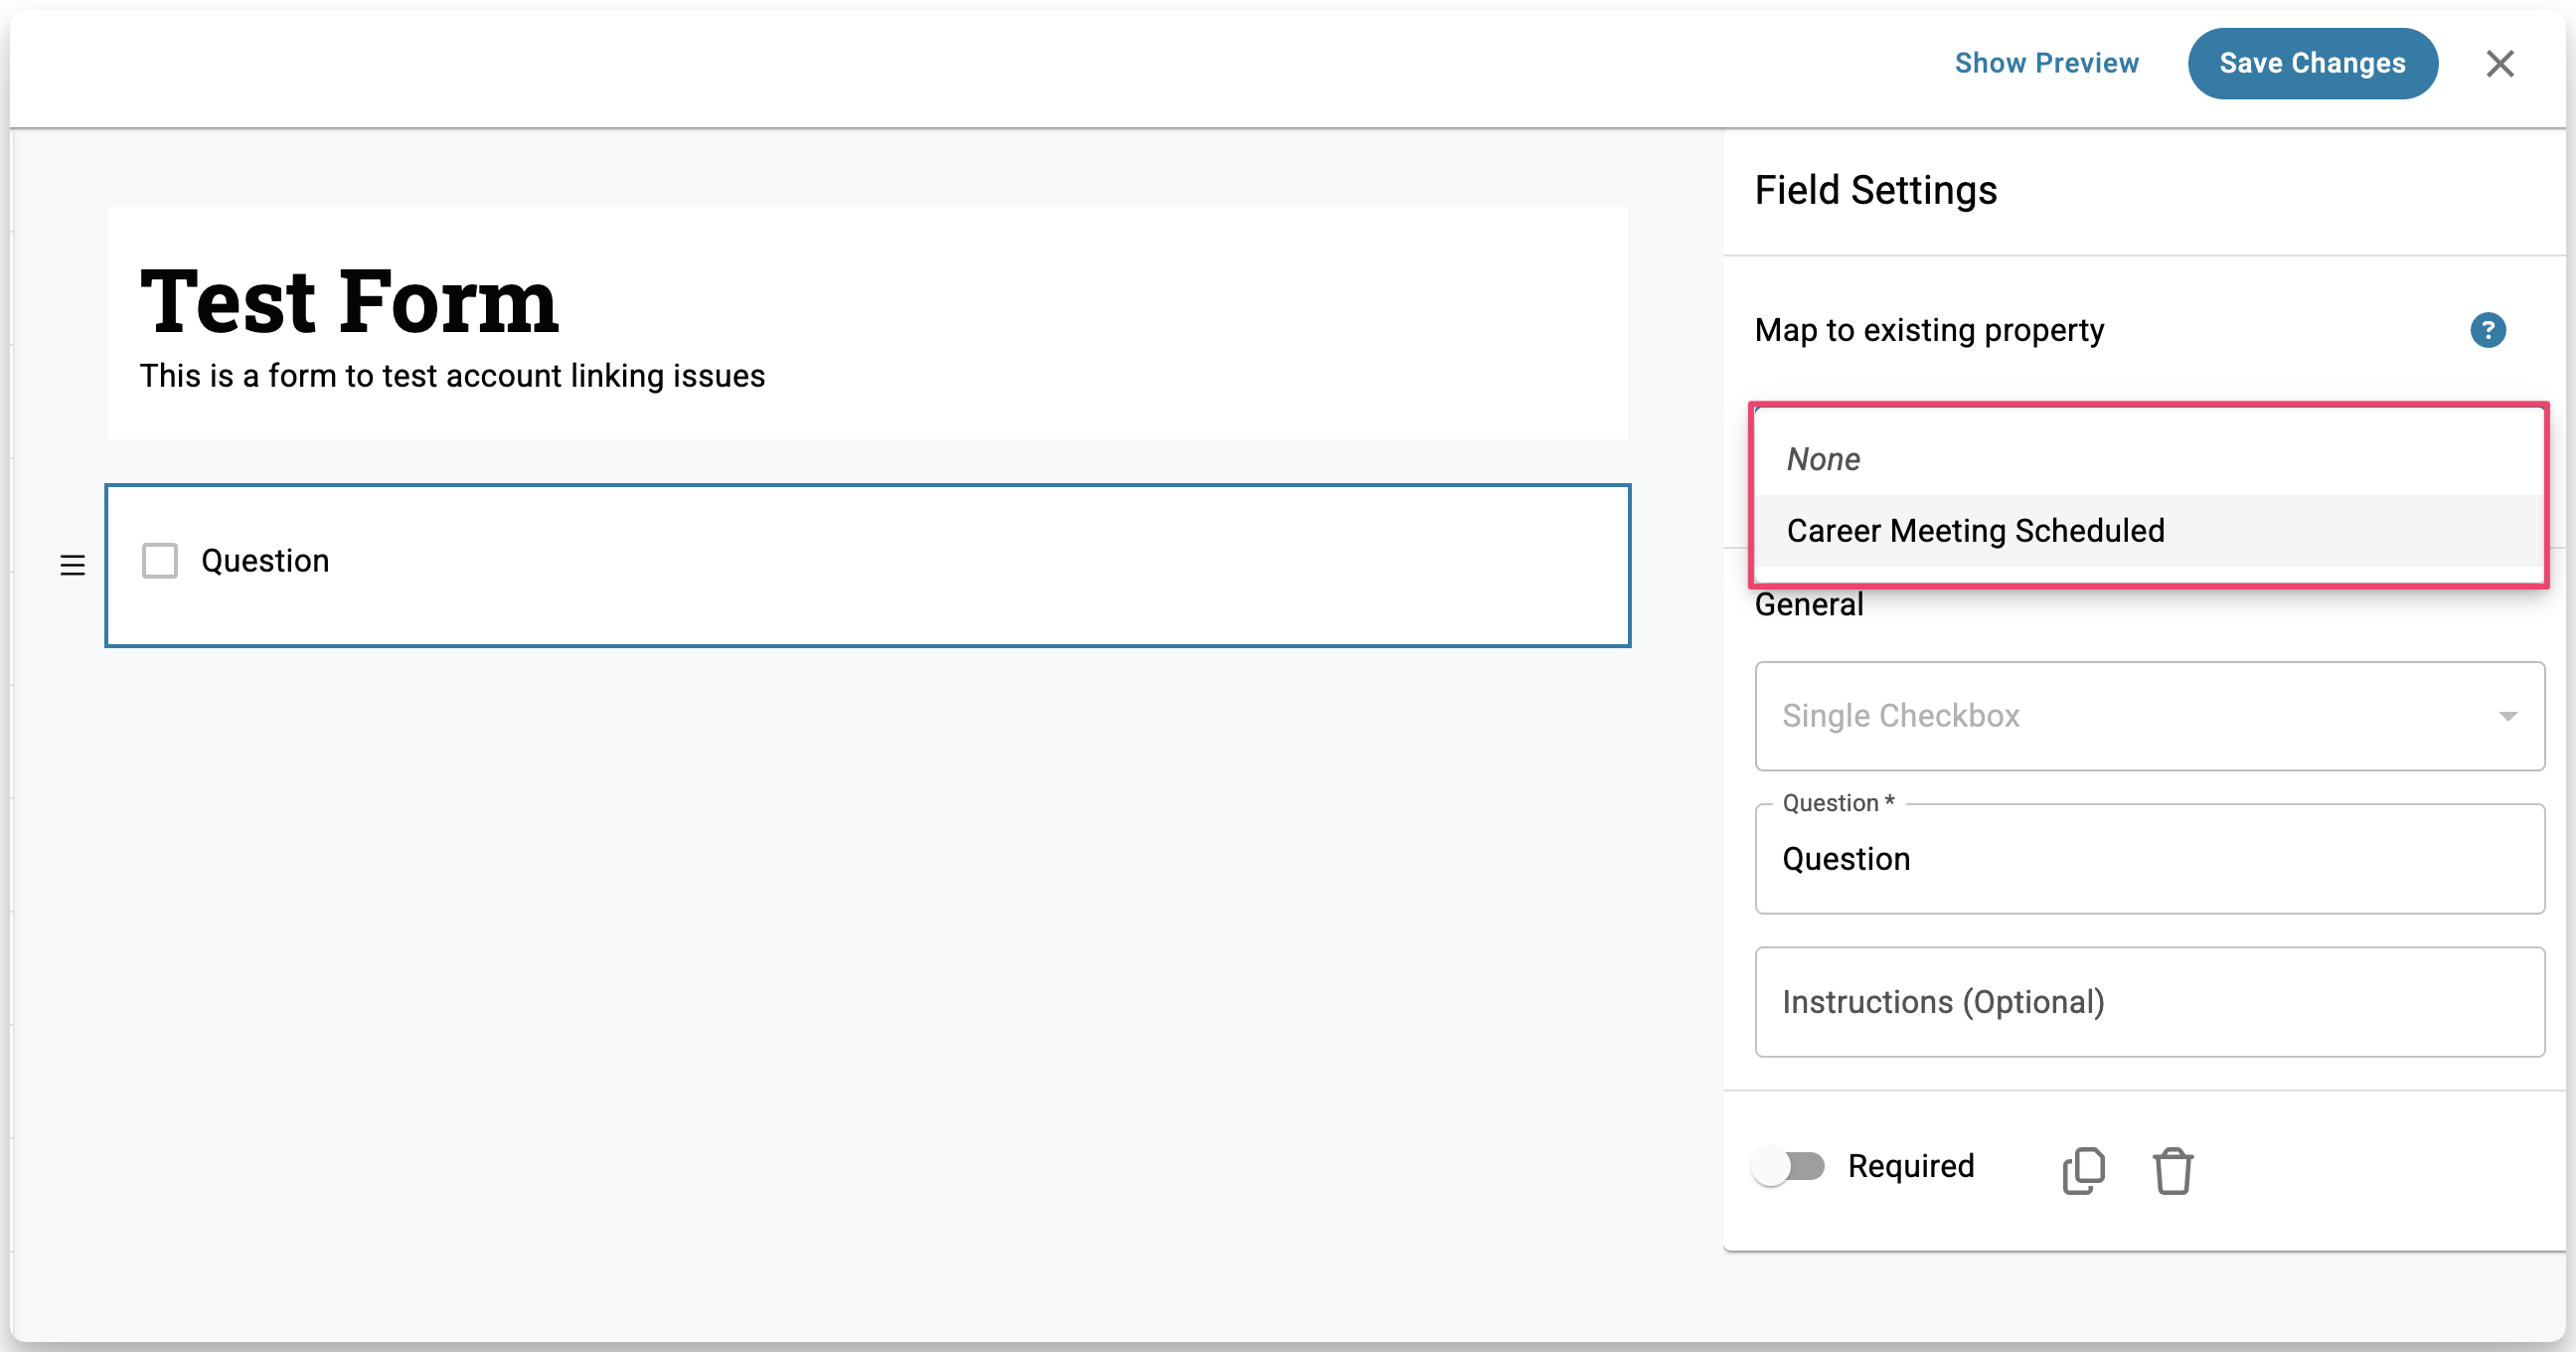
To Map a Question to a Custom Property
Add a supported question type, then in the Field Settings panel on the right, use the Map to Custom Property dropdown to select the property you want to connect. When you do, the answer choices from that property will automatically populate the form question. You can edit the question title but not the answer choices. To change those, edit the Custom Property itself.
Supported Question Types
Not every question type can be connected to a custom property.
Form Question Type | Can Be Connected To |
Short Text | Text custom properties |
Single Select | Single select custom properties |
Multiple Select | Multiple select custom properties |
Date fields | Date Custom Properties |
Number | Number Custom Properties |
Single Checkbox | Single Checkbox Custom Properties |
Stop Collecting Form Responses
If you no longer want to collect responses:
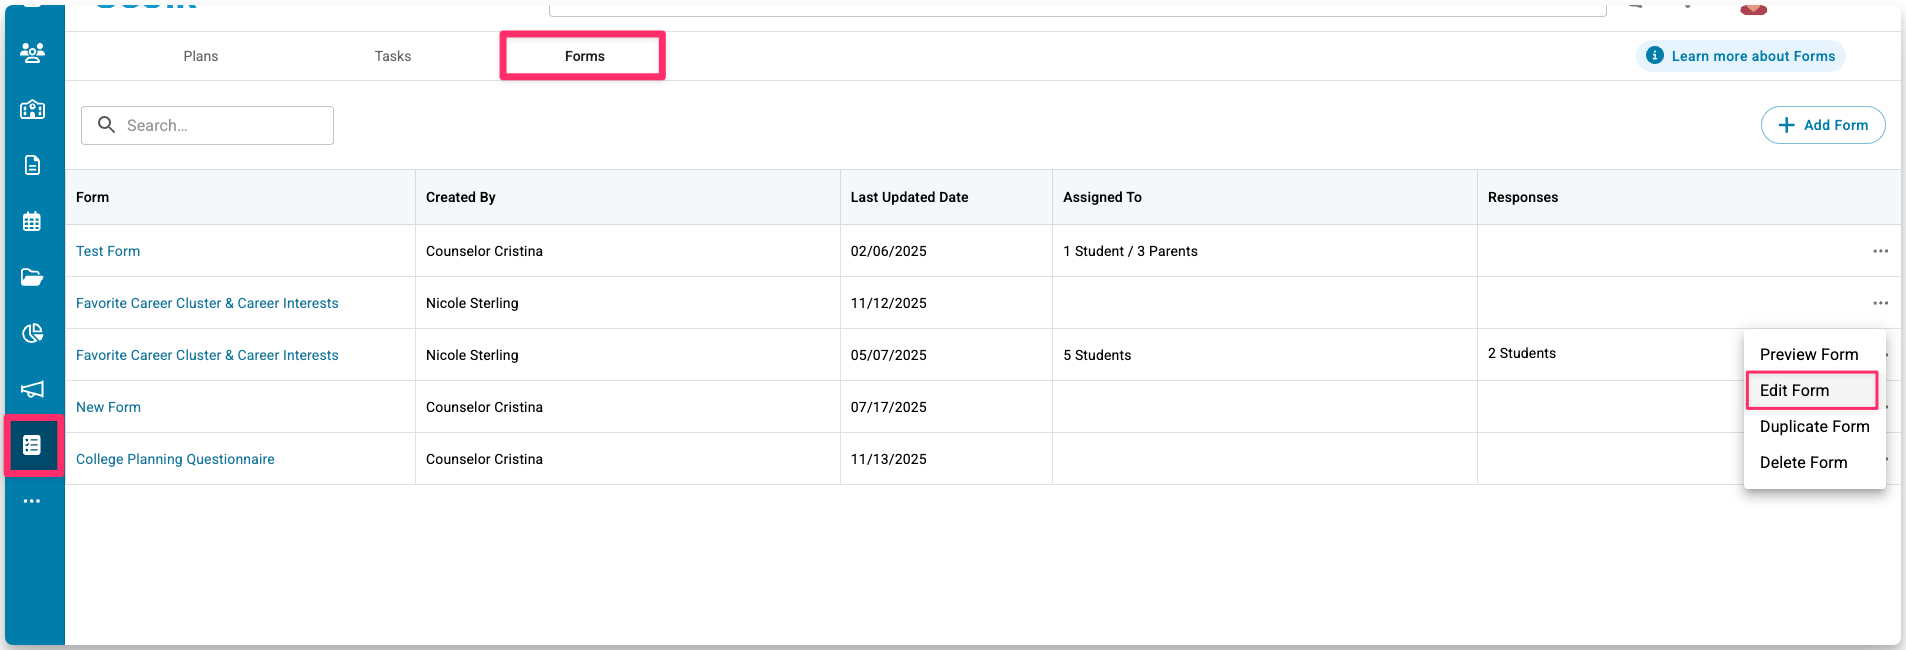
- Go to Assignments > Forms. Then, click the three dots next to the form (•••), then select Edit Form.
- In the Form Settings panel on the left, toggle off Accepting Responses.
Editing Forms
You can edit a Form at any time, even after it’s been assigned or submitted. If you make a change to an assigned Form, it will update for everyone. You don’t need to reassign it.
Students who haven’t responded yet will see the updated version when they open the Form. If a student has already submitted, they will also see the changes if they go back and open it again.
A few things to keep in mind when making changes:
- Adding a question: shows up for all assigned respondents, including those who already submitted if they reopen the Form
- Deleting a question: permanently removes the question and all responses tied to it. This cannot be undone, so use caution
- Changing answer choices: updated options appear the next time the Form is opened. Existing responses using previous options remain unless the Form is resubmitted
To edit a Form:
- Go to Assignments > Forms, click the More Options button (•••) next to the Form, and select Edit Form.

- Make your changes in the Form Builder, then click Save Changes to apply them.
Duplicating Forms
To reuse or modify an existing form without starting from scratch:
- Go to Assignments > Forms. Then, click the three-dot menu next to a Form (•••), then select Duplicate Form.
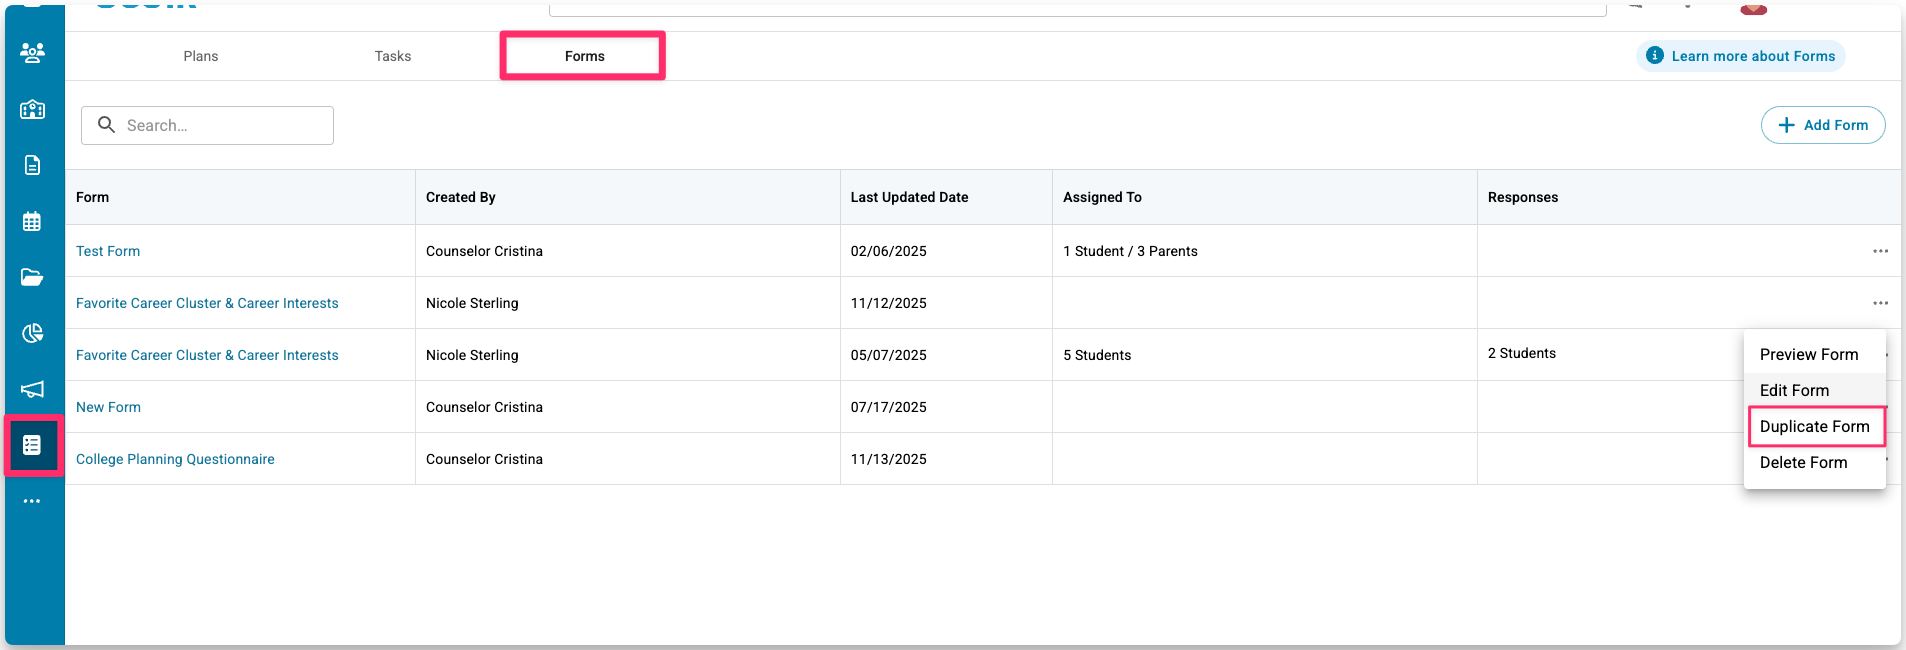
- The copied Form will open in the Form Builder with “(Copy)” added to its name. Edit the title, description, or questions as needed — changes save automatically.

Duplicated Forms don’t include past responses and can be assigned just like new ones.
Deleting a Form
- Go to Assignments > Forms. Then, click the three-dot menu next to a Form (•••), then select Delete Form.
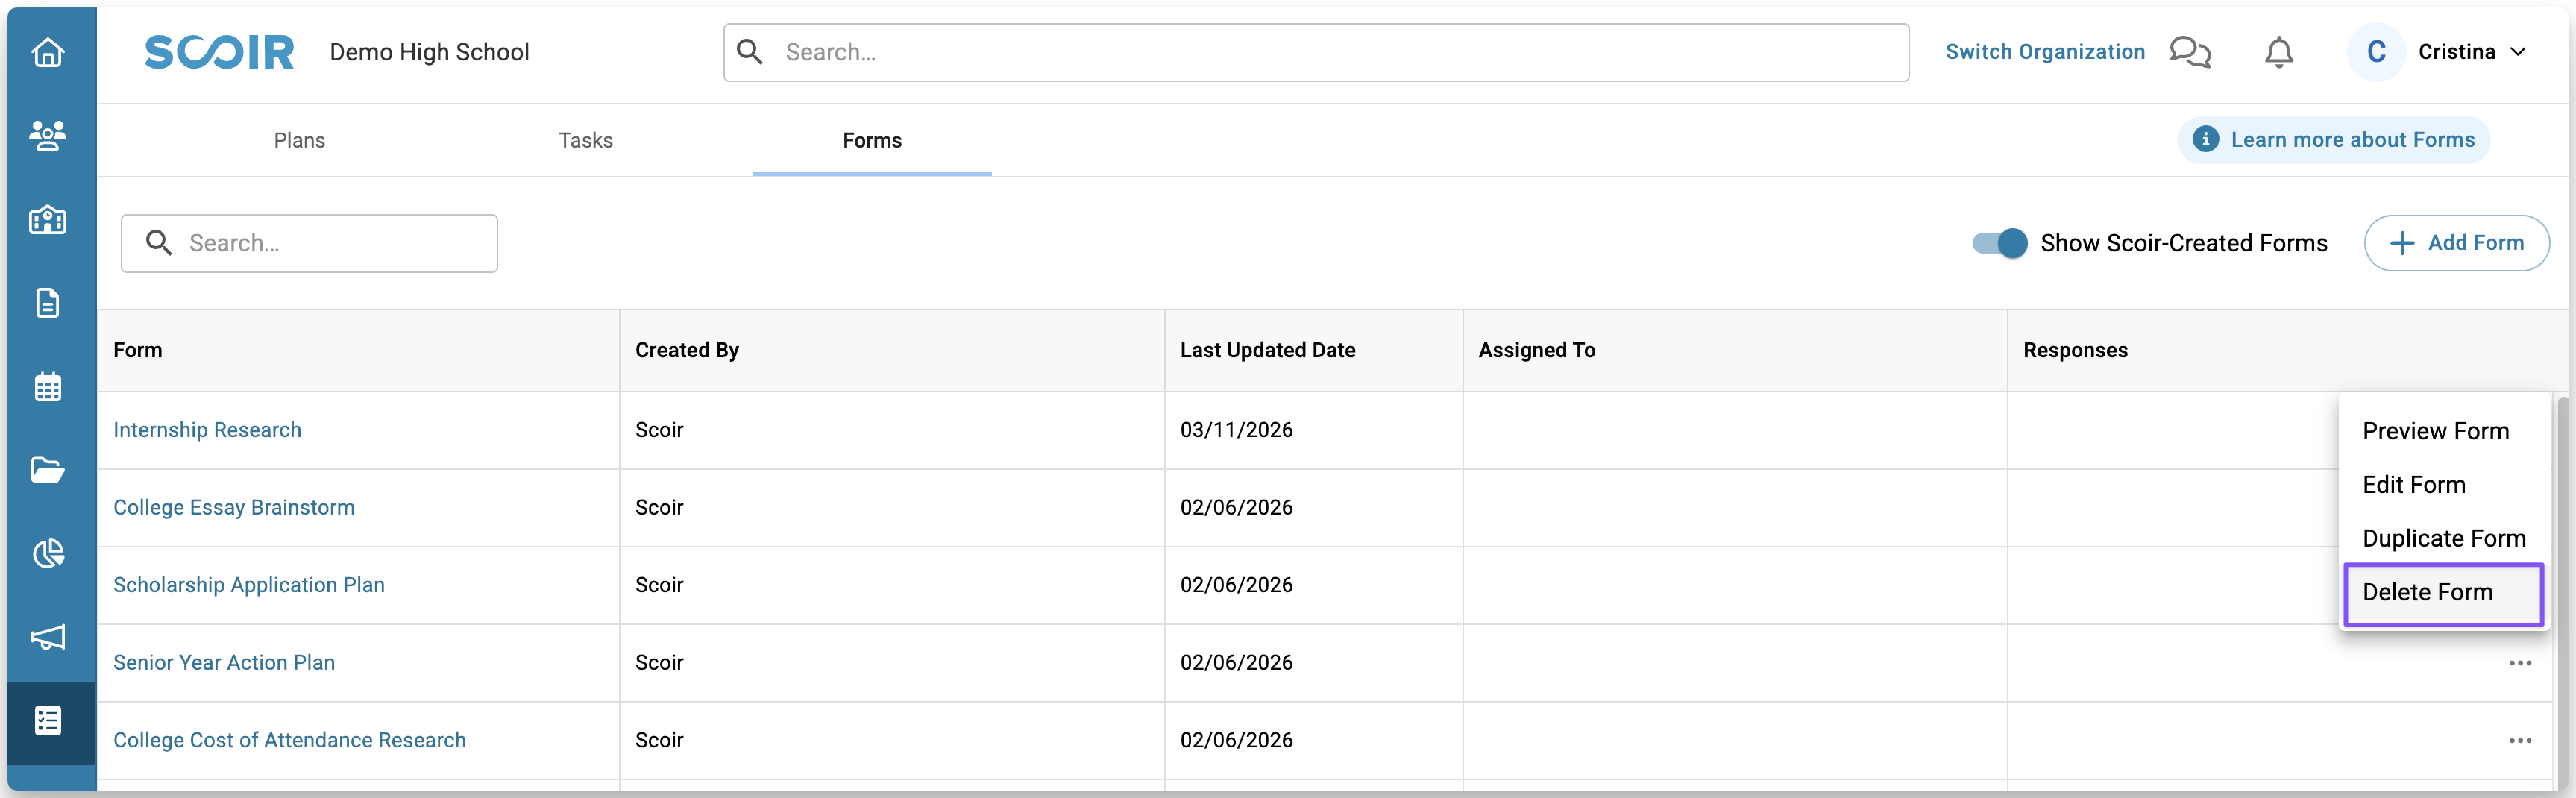
- Confirm when prompted.
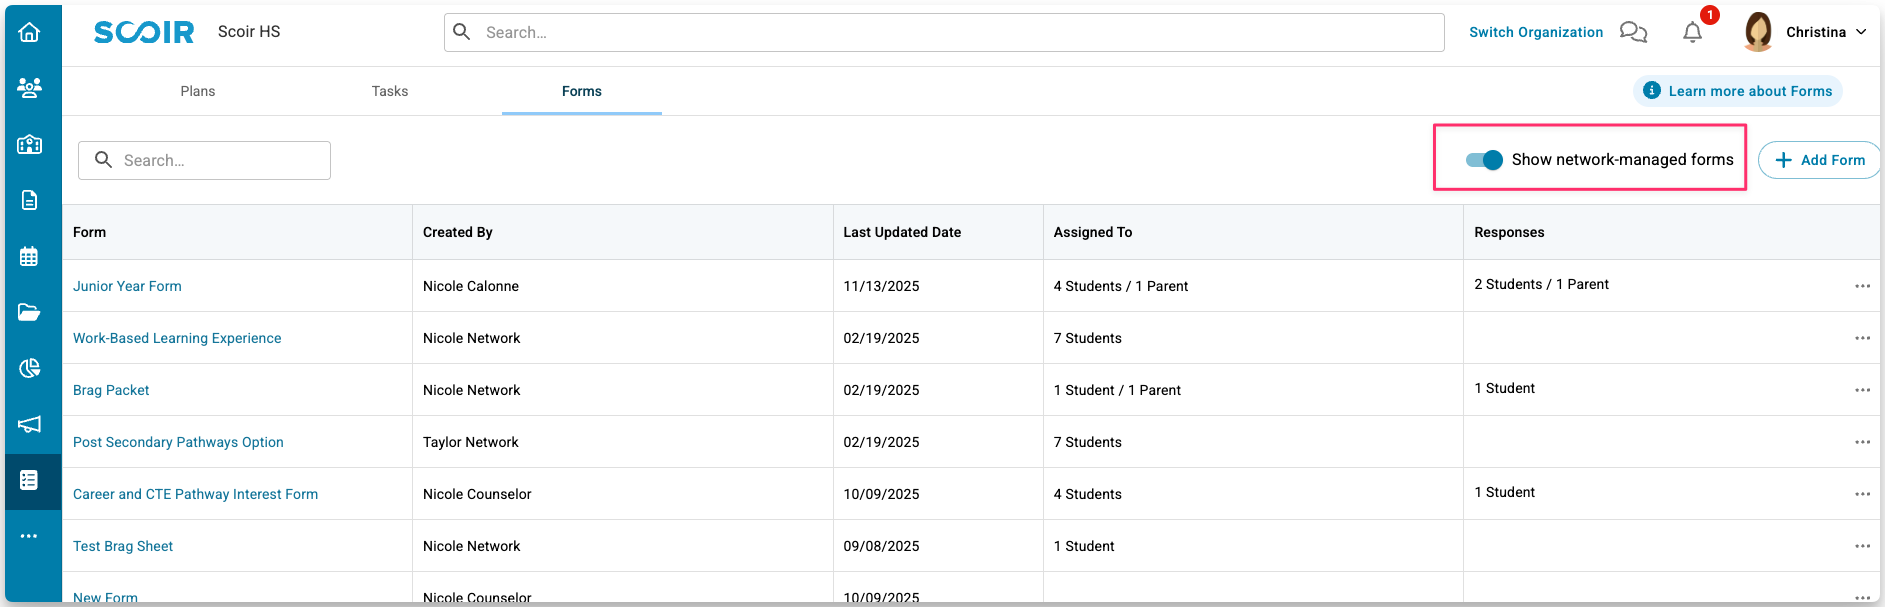
District Forms
Districts can create Forms to gather specific information using the same guidelines above. If your district has any Forms that apply to the students at your school, you can easily view them by turning on the Show network-managed forms toggle.
Frequently Asked Questions
What does mapping to a custom property mean?
When you map a form question to a custom property, the student’s or parent's response will automatically update that property. This makes it easy to collect information and use it in the student roster, including in filters, columns, and saved views.
Each custom property can only be mapped once within a form.
• Any changes counselors make to the custom property value will be visible to the student the next time they open the form.
• If the student submits an updated response, their answer will overwrite the counselor’s change.
• If the counselor edits the property after the student submits, the counselor’s edit becomes the stored value for that mapped question. Avoid editing or deleting custom properties after mapping, as that can overwrite responses.
Can I edit or delete form after it's been assigned to students or parents? What about after they submit their responses?
Yes, counselors can edit forms after they have been assigned and even submitted by students or parents, but should do so with caution.
The impacts of editing a form after it has been assigned and/or submitted are as follows:
1. Deleting a question means you won't be able to view its responses because it will be gone.
2. When new questions are added, respondents will see them the next time they open the form.
3. When answer choices are added or removed, respondents will see the changes when they open the form. Previous submissions under old options remain visible until students resubmit with the new options.
Can students or parents resubmit their responses?
Yes! If you need students or parents to resubmit their responses for any reason, you have two options:
1. Mark the task associated with the form as incomplete. This returns the assignment to the respondent's list of incomplete tasks, giving them the chance to complete it again.
2. Assign a new task with an updated description and due date, prompting the respondent to review their original submission. Link this task to the same form. This allows them to modify their responses and resubmit when they access the form.
Can districts create and use custom properties in their Forms?
Yes. Districts can create custom properties and map them to district-managed Forms. This allows student data to stay consistent across all schools in the district. When a student transfers within the district, their mapped property data moves with them, helping each school maintain the same information without re-collecting it.
A few key things to know:
• Schools must assign district Forms through Tasks for students to complete them.
• District-created custom properties and Forms cannot be edited or deleted by school-level counselors.
• Student information only transfers within the same district. It does not move between schools in different districts.